Wednesday, 17 September 2014

Road to the GT: Anti- Big Hitters Tactics

Hello! Here's another tactics article from my "Road to the GT" series, focusing again on some popular tournament lists. Today I'll be looking at some of the bigger units you're likely to see and in particular the ones that cause the most annoyance: Wraithknights, Riptides, and Imperial Knights! I'll give a brief overview and analysis of each, and then some strategies and counters you can use if you face them across the tabletop.

  • Eldar Wraithknights. One of the main reasons Eldar can compete so well at the top tables is this guy. He's very big indeed- Toughness 8 renders him immune to weapons Str 4 or less, while 6 wounds ensures he's going to stick around. He only has a 3+ armour save, but with the crazy MC terrain rules he can almost always find a corner of a woods or some rubble to dip his toe into and grab a 5+ or better cover save. He has 3 loadouts, but the default is by far the most common- 2 Str 10 AP2 shots that cause instant death on 6s to wound. He's great in melee too- 4 attacks and Initiative 5, again at Str 10 AP2, ensures he'll always hurt something.
    Quite simply, every Eldar army should take one, as he solves so many problems that he's impossible to leave out.
  • Tau Riptide. With Toughness 6 and 5 wounds, along with a 2+ armour save and 5++ he's almost as tough as the Wraithknight. Of note is the "Nova Reactor" it has- every turn it can choose to try and overcharge one of its systems on a 3+ (losing a wound if it fails). This either greatly improves its primary weapon, allows it to fire its secondary weapon twice, allows it to jump 4d6" in the assault phase, or upgrades its invulnerable save to a 3++.
    There are a few builds more commonly seen that others- Heavy Burst Cannon/Velocity tracker/SMS/Earth Caste Pilot Array (reroll failed Nova charge rolls) is pretty fearsome anti-flyer/anti-FMC and the ECPA is probably the only thing that makes the Heavy Burst Cannon worth using. The most common is probably Ion Accelerator/Early Warning Override/Fusion Blaster though; it's one of the best Deep Strike deterrents in the game and a key part of the "Tau Interceptor Army of Doom".
    Riptides are very common in Tau lists for the same reason as Wraithknights in Eldar lists- they just solve problems that the army wouldn't be able to otherwise.
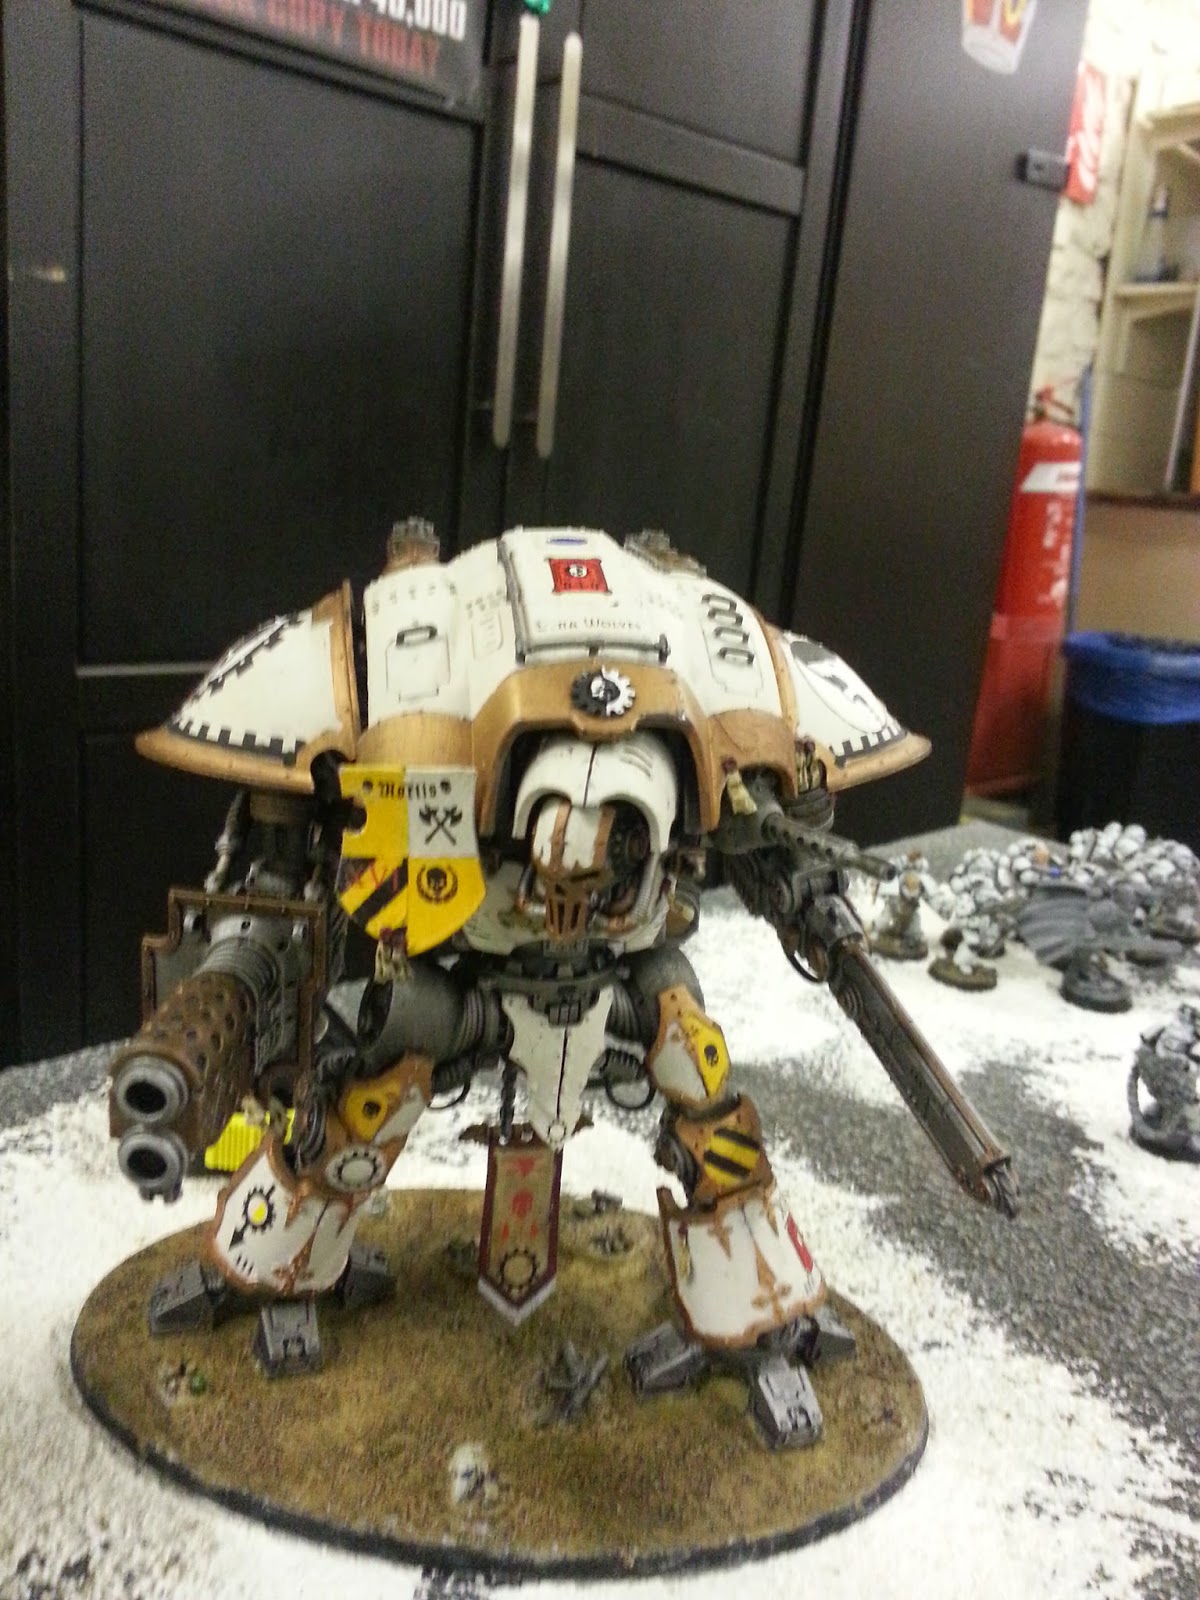
  • Imperial Knights. These "Dreadnoughts on steroids" are one of the first Super Heavies to see widespread use at tournaments around the world. Their stats are pretty impressive: they have a 12" move, Armour 13/12/11 and 6 Hull Points, ignoring any result other than "Explodes" (which just removes an extra D3 HP). For weaponry either have a 36" large blast Melta Cannon, or a Battlecannon that shoots twice. In the other hand they've got a Str D chainsword, able to comfortably punk out almost any other MC in the game. Worth noting is the Heavy Stubber that's allowed to split fire from the other weapons- normally this will shoot whatever the Knight plans to charge, while the main gun blows up something else. In melee they can also make Stomp attacks- D3 small blasts, the first touching the Knight and then subsequent blasts within 3" of the previous, allowing them to be chained up to 15" away. The stomp table can be brutal, with most results doing reasonably strong hits, but a 6 on the table just removes everything under the template, no questions asked...
    Regardless of the good profile, what makes Knights useable is their special "Ion Shield" rule. This allows them to choose a facing at the start of each enemy shooting phase, and gain a 4++ against any damage to that facing for the turn. This stops firepower armies just blowing them away with ease, and takes them from "pretty good" to "table controlling".
  • Pacific Rim. This is more a style of army that a particular unit, and is named after the blockbuster film. It contains the "Adamantine Lance" formation- 3 Imperial Knights, and while any is within 3" of another they can re-roll their Ion Shield save. A Pacific Rim army list will have an Adamatine Lance formation and then 2-3 Riptides or Wraithknights, resulting in an army full of overwhelming firepower, great melee ability and obscene durability. This is a very tough matchup for many armies- most Deathstars can't really deal with the threat of being Stomped to death, and it can often kill all of the tools you've brought to deal with heavy armour/MCs before you can use them effectively.

So what should you do if you find yourself matched up against any of the above? These are some thoughts to get the ball rolling:

Bring the tools. Winning the game starts with your army list, and here more than ever. Generally you should try to get high Str & low AP weaponry into your list anyway, but with the increase in these sorts of lists it's becoming more and more important. The other way to deal with these units is a tarpit- Wraithknights in particular are very vulnerable to this. They take about 4 game turns (8-9 rounds) of combat just to kill 20 guardsmen with a Ministorum Priest, which effectively takes it out of the game. Riptides can also fall victim to this, but they'll frequently be away from the front lines. Knights generally can stomp their way out of most tarpits pretty quickly, but it's still able to delay them for a turn or two. Force Axes are also a great way to instant kill Riptides, and Wraithknights too- just make sure they're Str 5 or higher.

Fight fire with fire. Linked to the above, but a less subtle strategy- these models are widely feared for a reason, and if you can include them in your army there's no reason not to! Unsurprisingly they work well as counters to themselves.

Measure your threat ranges. Both Imperial Knights and Wraithknights do the vast majority of their damage in melee, so you need to make sure you're out of charge range as often as possible. Not a 10" charge, or even an 11" charge, but >12" away- it's very rarely worth the risk of losing a unit for a very small distance gain. The only exception to this is to bait them- if you position a good (but not vital) unit just over 9" away, that requires a 10" charge. Without fleet that's a pretty low chance (~17%), but many players will take the bait given the right target. After they (normally) fail the charge, you need to have something ready to counter with- a bunch of meltaguns, force weapons, grav guns, etc depending on what it is you're calling. Riptides are primarily shooting platforms with a long weapon range, and they can move and shoot, so this section isn't so important against them. However it's worth noting that you should be careful with its secondary weapon systems- a double shot SMS is great at clearing out vulnerable units and doesn't need line of sight, so make sure to measure far enough away.

Do you need to kill it? If your opponent is playing smart with their big hitter, they'll make it simultaneously difficult to deal with and vital to stop. However, you may find that sometimes you don't actually need to deal with it, even if only for a few turns. They may have deployed too far back, or away from viable targets, or you may be able to outmanoeuvre it. If this is the case, then focus on the rest of their army while you can, then turn your attention to the big hitter late game and/or focus on winning the mission.

Knight Specific- defeating the Ion Shield. Ion shields are a pain, doubly so with rerolls from Adamantine Lance. However, it only covers one facing, so use this to your advantage. Position units in both side arcs if you can, and something heavy hitting in the front to encourage them to shield their front. If you can hit both sides at once, it's simply 6 HP at AV 12, which you should be able to put down with ease. Remember as well that a walker that shoots in the shooting phase has to turn to face its target (unlike MCs), so use this to help get side armour (or even rear armour) shots.

So there we have it- my top strategies for dealing with the enemy's biggest and best! Thanks for reading if you did, and if not then please feel free to check out the first two posts as well. This article should wrap up the "Road to the GT: Tournament Tactics" series, and in good time too; the heat is less than two weeks away, and I've still got to paint up the a load of Dire Avengers and a 5th Wave Serpent...

SimonW

Friday, 12 September 2014

Road to the GT: Anti- Spam Tactics!

Hello! Today I'll be continuing my Road to the GT series with another tournament tactics article. Last time I looked at several popular Death Star builds and some counter strategies, but now I'll be looking at another popular style of tournament army lists- spam!

So to start, what do I mean by a "spam" list? Essentially, a spam list is simply one that takes many of the same unit, rather than many different units. While this may sound innocuous, it's normally because certain units are simply better than others- a Space Marine Stalker is quite simply better than a Hunter in all regards, for example. By taking multiples of a reasonably good unit ("spamming" the unit) it's quite easy to get a pretty good army; however when you start spamming the best units not just from your faction but from the whole game, the army goes from pretty good to obscenely strong. Below I've listed a few of the most frequently spammed units you're likely to run into, along with some of the corresponding builds:
  • Eldar Wave Serpents. One of the most common, and possibly the strongest, spam builds currently. Expect to see 4-5 of them, either containing Dire Avengers for Objective Secured or Fire Dragons for dealing with high armour. My list for the GT is a prime example of a "Serpent Spam" army.
  • Necron Barges. Both Catacomb Command Barge chariots and Annihilation Barges are very strong vehicles, each having AV 13 and 3HP. Command Barge chariots are currently very strong with the changes to chariots and Jink in 7th Edition, and Annihilation Barges have fearsome firepower with their twin-linked Tesla Destructor-, 4 shot Str 7 weapons with the Tesla rule (any 6s to hit, even on snap shots, do 3 hits instead of 1). Combined with a fairly reasonable point cost for either means you should expect to see at least 4 barges in most Necron tournament armies.
  • Necron Canoptek Wraiths. Str 6, T4, W2 3++ save Jump Infantry that come in squads of up to 6. Frequently you'll see 2-3 full units. These guys really excel when led by a Destroyer Lord with a 2+ armour save, who tanks most wounds and can Look Out Sir anything AP2, as well as granting Preferred Enemy (Everything) to the unit. This Necron tournament build is frequently known as "Wraithwing".
  • Necron Night Scythes. Cheap flyers that can transport troops and drop them precisely while zooming, as well as having twin-linked Tesla Destructors too. It's easy to get 5-6 of these planes in a fairly small army. Variants of this list are often referred to as "Cron Air."
  • Space Marine Tactical Squads. Yes, the humble Tactical Marine with his brand new Objective Secured ability and his trusty transport is on the march once more! This build revolves around at least 5 full Tactical Squads in Drop Pods or sometimes Rhinos. Each squad uses the Combat Squads ability to create 15 Objective Secured units (10 combat squads and 5 transports) spread across the board, all of which are pretty tricky to deal with. Chip Boyd from Torrent of Fire has a great series on his Drop Pod Salamanders list.
  • Space Marine Bikes. As they can be made into Troops by a Captain or Chapter Master on a bike, Space Marine Bike squads are prime candidates for spamming, with 2 special weapons, a combi-weapon and a heavy weapon attack bike in each 5 man squad! Expect to see them as White Scars, with Khan as the Warlord to grant them all Scout, forming a very powerful alpha strike army (often with many Grav weapons). My friend Drew's White Scar list is a classic example.

So how do you counter a spam list like the ones above? Here's a few ideas to get started:

Design your list well. A good strategy starts with the models you bring. Unfortunately as spam lists are so prevalent it means you need to factor questions such as "How can I deal with 5 Wave Serpents/5 Necron Barges/50 Tactical Marines in a given game" into your list building. There's not much more to say here- spam armies are excellent at beating lists that don't have enough of the right tools.

Be extra careful with deployment. When you play against spam, your deployment needs to be absolutely on point. You need to ensure you protect whatever tools you have that can tackle their best units, and be willing to sacrifice any units that won't be of much use. When you deploy it's very important to measure threat ranges and be careful- you need to mitigate their firepower as much as possible early on while you try and thin out the spam.

Set up overlapping fields of focussed fire, and redundancy of firepower. When you set up shots, it's important to make sure than each of your units has multiple targets and each of their units can be targeted by several of yours. This way if you get lucky with some high damage early in the phase and take something down more easily than you expected, you can capitalise and get more shots on other targets. Similarly if you have some bad rolls, you can pick up the slack afterwards.

Target priority is always a big deal, but especially in these games. As most of their units will be similar, you might think it's easy to just shoot as many things as you can. This is a trap- you should try to kill whichever of their units is controlling more of the board, and see if they are relying on any key support units that you can quickly eliminate.

Mitigate their firepower as much as possible.  Most spam lists will be vehicle based, so don't shoot the next one until the first one is dead, or has Jinked. This is a simple rule but is one of the best ways to counter these lists. Against non-vehicles, try and use pinning and morale tests as much as possible, but it's still important to focus down units until they're either dead or no longer functional.

Well there you have it! Spam lists always make tough opponents, but if you play well and bear in mind these tips then hopefully it should be a bit easier to get a positive result from the game.
I hope you enjoyed the article, and that the series is proving useful. I'm going to wrap it up soon with an article on dealing with "Big Hitters"- Wraithknights, Riptides and Imperial Knights. I'll also cover the so-called "Pacific Rim" style builds too, with an Adamantine Lance formation of 3 Imperial Knights, allied with 2-3 Wraithknights or Riptides.
Thanks again for reading, and if you've got any more tips or ideas comment below!

SimonW

Wednesday, 10 September 2014

Battle Report: Eldar vs 30k Luna Wolves 1650

I had another GT practice game this week against a friend of mine, Ollie at Vale Renegades. We were playing Kill Points primary, and he used his beautiful 30k Luna Wolves army, including an Imperial Knight. I intended on writing a battle report, however we stopped the game fairly early on after some poor dice for Ollie and some great shooting from the Eldar killed an Imperial Knight, Loken, a Centurion, a Land Raider, a Tactical Squad, half of a Justaerin Terminator Squad and a Reaver Squad in the first two turns, losing 1 Wave Serpent & 1 Dire Avenger squad in return. Although the Kill Point scores were reasonably even at this point, it was certainly going to end in a pretty big win for the Eldar and it was already getting fairly late, so we called it there.

I hadn't really thought much about Kill Point missions with my list before this game, I'd mainly been focusing on its ability to take Objectives instead. However I was happy with my performance- barring a mistake where I decided not to Jink and cost myself a Wave Serpent, the list didn't give up many easy points. The Swooping Hawks are pretty easy to hide and the Dire Avenger squads sit comfortably in the tanks unless they need to shoot, when they can always Battle Focus out of sight or into cover afterwards. My Fire Dragons will often trade themselves for an enemy vehicle if I need them to, else they'll hide as well. The Wraithknight is a pretty tough customer, and the rest of the list is AV12 3HP fast skimmers, so they can generally stay out of too much trouble.
I can also take Kill Points pretty efficiently, with Wave Serpents clearing any light vehicles early on to establish a lead then teaming up with the Night Spinners to start killing off infantry.

I do want to thank Ollie for playing so graciously in the face of a truly cheesy army, and for giving me a chance to try my list against something I was previously worried about- the dreaded Imperial Knight. Protip: Kill it with Fire (Dragons)! I've got pictures of the finished parts of his army- they really blow my "Craftworld Skittles" Eldar out of the water:


Ollie's amazing (albeit short-lived) Luna Wolves Imperial Knight


Luna Wolves Reaver Squad in front of a Land Raider


A small Luna Wolves Tactical Squad


Luna Wolves Tactical Squad, Land Raider, Contemptor Dreadnought and Imperial Knight


As we didn't really play a full game, I'm not going to write the game up as before, but I will instead be doing an extra "Big Hitters" entry in my Road to the GT tactics series, focusing on how to tackle Imperial Knights, Wraithknights, and Riptides, as well as Pacific Rim style builds. Before that there's the Anti- Spam Tactics article though, and all being well they should both be finished soon.

Thanks again to Ollie for playing and agreeing to let me photograph his awesome army, and also thanks again to everyone for reading! 

SimonW

Sunday, 7 September 2014

Road to the GT: Anti- Death Star Tactics

Hello, and welcome to the latest post from Back In The Box! Today I'll be talking about some of the popular army lists you're likely to encounter at a GT style event, and some tactics you can use to try and get the edge over your opponent!

So, what army lists are popular at tournaments at the moment? Naturally there's a wide variety, but many of the most "competitive" builds can be separated into 2 categories: Death Stars; or Spam. Here I'll be focusing on Death Stars, but I'll do a follow-up post about tackling Spam lists too.

A Death Star build normally focuses on using very powerful combinations of rules to create a single incredibly powerful unit that is both deadly and resilient. To qualify, it normally has to have a way to destroy at least 2 units per turn (multiple assault, split fire, etc), and a way to absorb any incoming damage (re-rolling saves, tanking characters, invisibility, etc). The lists will have some support elements too- often lots of small troop squads to claim objectives while the Death Star destroys your opponent, along with some hard hitting units to fill in any gaps with the remaining points.
Some common Death Stars at the moment are:
  • Eldar Primary/Dark Eldar Allies "Beast Pack"
    -This is the most common Death Star in the current meta- essentially it's a large Beast Pack unit from the Dark Eldar codex consisting of at least 20 Khymerae (space dogs that move as beasts with 3 base attacks at Str 4 and a 4+ invulnerable save [4++ for short]), with some characters for support. These are almost always the same- Baron Sathonyx, for Hit and Run and a 2++ to tank wounds, and several Eldar psykers to either cast Fortune (re-roll failed saves), Invisibility (can only be targeted by Snap Shots or hit on 6s in melee), or both. One psyker holds a relic called the Shard of Anaris, making the unit fearless. It uses multiple assaults to attack many units at once, and with Hit and Run it can hide in combat effectively too.
  • Eldar Primary/Dark Eldar Allies "Seer Council"
    -This involves 9-10 Eldar Warlocks on jetbikes, joined by Baron Sathonyx (from above) and 2 Eldar Farseers on jetbikes, one holding the Shard of Anaris again to grant Fearless. It relies on casting Fortune and then getting 2+ rerollable armour and cover saves from various warlock powers, as well as using the 2++ reroll from the Baron. Again it uses multiple assaults to attack many units at once, with more Warlock powers to debuff enemies and buff themselves, alongside hiding in combat too. It was a staple of 6th edition but it's less common now, as it relies on casting far more psychic powers than the Beast Pack, so with the psychic changes in 7th edition it's much less reliable.
  • Eldar Primary/Dark Eldar Allies "Beast Council"
    -My favourite Death Star build currently just for the sheer audacity of it. Pioneered at the ETC by (I believe) Team Wales, this monstrosity contains a full Seer Council of jetbike Warlocks buffing themselves, and then also a full Beast Pack with 5 Spirit Seers, Baron Sathonyx and Eldrad Ulthran! It tries to cast Invisibility on the Beast pack, making them almost impossible to shoot, and then Fortune on the Seer Council to reroll 2+ saves (Eldrad joins the Beast pack and uses his 24" range Fortune on the Warlocks). It's very flexible, and extremely deadly. The Beasts can assault many units a turn, and the Warlocks can join in or bust tanks with str 9 singing spear shooting. The unit with the Baron (normally the Beast Pack) can also hide in combat. A common tactic with the Warlocks is to roll all their powers on summoning, creating new units of daemons and even turning some of the Eldar psykers into Lords of Change!
  • Space Marines Primary/Grey Knights Allies (or vice versa) "Centurion Star"
    Not the most durable Deathstar out there, but it packs a huge punch. 5-6 Centurion devastators with Grav Cannons and Grav Amps, as well as an Omniscope to split fire. The characters are normally Draigo (if he's allowed) to always have Gate of Infinity, or a Grey Knights Librarian, and Tigurius of the Ultramarines for Prescience/Ignores Cover/Other Divination Nonsense. The unit then teleports around, shooting the daylights out of 1-2 units each turn. The unit relies heavily on a tanking character, such as Draigo or the Chapter Master from the Bikestar, to mitigate return firepower as well as the natural 2+ saves and Toughness 5 of the unit.
  • Space Marines "Bikestar"
    This is what my opponent Drew used in this battle report. I won't go into as much detail here as I've already covered it- essentially it's a Chapter Master with a 2+/3++ save and Eternal Warrior to tank wounds, Khan to grant scout moves, and a command squad with either Grav Guns, Storm Shields or both. It can shoot pretty well, can jink for a 3+ cover save, and is fearsome in assault too. Plus with Hit and Run it's very hard to catch, hiding in combat for most of your turns.
  • Tau "Farsight Bomb"
    Commander Farsight and 7 bodyguard suits, and either Shadowsun or a Commander, along with a whole bunch of gun drones. Someone in the unit holds wargear granting twin-linked, ignores cover, and a choice Monster Hunter/Tank Hunter/Stubborn for the unit as well as BS5 for the drones, and everyone else takes dual missile pods/dual plasma rifles/dual fusion blasters and target locks. As you may have guessed, it's plan is simply to shoot 3-4 units off the board each turn. It can Deep Strike without scattering, and delivers a crippling blow with the huge volume of firepower. However it isn't very maneuverable after it arrives and often isn't very resilient to return fire either.
  • Astra Militarium Paskstar
    A fairly new list that emerged from the ETC, this Death Star is different to the others in that it's a vehicle squadron. It uses 3 Leman Russ Punishers, led by Knight Commander Pask, and drives across the board mowing down whatever it can reach. Due to his order the squadron gains the split fire rule, and as Pask has rending or pseudo- tank hunter the unit is quite flexible. It requires much more support than other Death Stars as it needs to be bubble wrapped by Conscripts to prevent enemies getting too close, and it also needs multiple psykers nearby, to cast Prescience for re-rolls to hit and Forewarning to get a 4++. Still, the firepower is fearsome, and not many armies have great solutions to 3 AV 14 Vehicles with 4++ saves that you have to deal with at long range.
Note: In this article, I frequently refer to "tanking wounds" or a "tank character", etc. This means using the "closest model first" wound allocation rules to allow a character with a significantly better save/more wounds/both than the rest of the unit to absorb firepower that would annihilate his squadmates by simply standing at the front. A tank should have Eternal Warrior too, so that there's no way for him to suffer Instant Death and leave the unit vulnerable.
I also refer to "hiding in combat". This involves using the Hit and Run rule selectively, so that you launch an assault in your own turn, stay locked in combat for your opponent's turn (so you can't be shot), and then Hit and Run away at the end of their turn to escape combat, and be free to act as normal in your own turn again.


While the above lists are all very difficult match-ups to play against, it doesn't mean they can't be beaten. Here are some of the best ways to go about it:

Avoid them. There's a very good article on Torrent of Fire by Justin Cook about using MSU (Multiple Small Unit) tactics against Death Stars. Essentially, if you spread your forces and stick to the corners and edges of the board, you can mitigate the Death Star's ability to kill multiple units quickly and force them to spend valuable time crossing the board trying to get to you (and crucially, not doing anything in the mean time).

Play the mission. You can't beat it in a straight fight, but can you hold more objectives at the end of Turn 5? Can you achieve more TacOs than them? Good placement of objectives also helps here- spread them out as much as you can, so that the Star can't threaten more than 2-3 at once, allowing you to draw or even win the mission. This isn't possible in Kill Points games, and if you're playing Kill Points against a Death Star then you have my sympathy- they're very, very hard to beat at Kill Points. Just try to get as many points from the game as you can, and drink beer.

Kill what you can, when you can. Normally, the Death Star will be about 1/3 to 1/2 of your opponent's points, tied up in an unkillable block of nastiness. However, this means that all of your army can focus on eliminating their support units, not worrying about killing anything else! Destroy any small troop squads when you get the chance, stopping your opponent from claiming objectives. Kill his fire support if you get the chance, using your numerical superiority to gun them down efficiently. However, the caveat "when you can" definitely applies. You need to keep moving away from the Death Star with most of your army, and occasionally sacrifice something to it when there's nowhere else to go. Try and make sure that, when you sacrifice something, it will only be able to kill that unit. Transports with units inside are excellent here- he will often have to waste a turn killing the transport, and then another turn killing the unit too! If you just line up and try to out-shoot your opponent, he will, to put it bluntly, move across the board and kill your whole army.

Take your chances. Many of these Death Stars rely heavily on psychic powers or careful positioning. If your opponent fails a psychic power or makes a mistake in positioning, it may create an opening for you to either kill off some of the key models from the unit, reduce its numbers, or even destroy it entirely.

Go first. While this sounds obvious, it's often forgotten. A jetbike Warlock council without any psychic powers up is as durable as 10 tactical marines. A naked beast pack just becomes 30 T3 models with 4++. Bonuses to seize the initiative are excellent here- Coteaz with his re-roll, or the Strategic Warlord Trait granting +1, or even Asdrubael Vect/Imotekh the Stormlord getting a 4+! Remember than most of these bonuses stack too.

Deploy well. Again, this sounds obvious, but this is one of the times you should definitely spread out in deployment. Additionally, you'll almost certainly be deploying second if your opponent gets any say in it, so use this to your advantage and counter-deploy, using your tape measure to stay out of their threat range. Remember though that you'll almost always be trying to seize, so ensure that if needs be you can move Turn 1 to shoot their Death Star while it's vulnerable.

So there you have it, my best anti- Death Star tactics. Even if you do all of the above, victory isn't guaranteed, but at least you've got a fighting chance against some of the most frustrating armies to play against. Next time I'll be writing about another most style of tournament build- spam!

Until then, thanks once again for reading, and as always any comments or ideas are welcome below.

SimonW

Friday, 5 September 2014

Road to the GT: Eldar List Analysis

This is the first post of several I plan on writing in the build up to the 40k UK GT. Here, I'm going to cover the evolution of my Eldar list, from first concept to the current (and most likely final) draft.

Firstly- why mech Eldar? Well, I've had an Eldar army for a long time. I particularly love the look of their vehicles, and they happen to be one of the dominant builds at the moment, which doesn't hurt! I have tried using a Beast Pack in the past, but honestly I find it quite boring to use and it doesn't lead to fun games.


What people normally see when I pull out my Eldar Codex.


My current list has taken several iterations to fully develop- starting without a single Wraithknight but plenty of mixed Eldar/Dark Eldar mech, all the way up to 3 (!) Wraithknights and 4 stripped down Wave Serpents. Until recently, I had almost settled on 2 Wraithknights and 5 Serpents, 1 for Fire Dragons and the rest for Dire Avengers, as well as an allied Inquisitor carrying Servo Skulls.
But then last weekend Tony Kopach went and won the Nova Open with this list. I think it's really well constructed, and is a great example of building your army for the event you're playing.
The main thing his success did to me was to make me look at my Night Spinners again in a fresh light. I'd essentially confined them to the box in favour of a 2nd Wraithknight, but they've got a few things going for them in the meta right now. At the tournament I'm attending, there will almost certainly be several players running Invisibility-based builds, and Night Spinners are a way to tackle them. As the power has been nerfed slightly in the GT's FAQ so that instead shooting is resolved at BS1 rather than forcing Snap Shots, the Torrent and Large Blast firing modes could really help out in these games. They're also pretty good at damaging clusters of enemy vehicles, particularly Wave Serpents, as only the primary target is allowed to Jink and they have a 50% chance to chip a hull point or more against AV12.

So here's the list in its most recent form:

Primary Detachment: Combined Arms Detachment
Faction: Iyanden Eldar

HQ:
Autarch, Scorpion Chainsword

Troops:
5 Dire Avengers, Wave Serpent, Twin-Linked Scatter Lasers, Shuriken Cannon Upgrade, Ghostwalk Matrix
5 Dire Avengers, Wave Serpent, Twin-Linked Scatter Lasers, Shuriken Cannon Upgrade
5 Dire Avengers, Wave Serpent, Twin-Linked Scatter Lasers

Elites:
5 Fire Dragons, Wave Serpent, Twin-Linked Scatter Lasers, Ghostwalk Matrix

Fast Attack:
6 Swooping Hawks

Heavy Support:
Wraithknight (Warlord)
Night Spinner
Night Spinner


How my current list looks on the tabletop...


I have to say that despite only having played once with it so far, it's the version of the list I've enjoyed the most. 2 Wraithknights can be fun but they're a lot of points for a fairly small amount of firepower, but 1 solves so many problems for a mech Eldar list that it is an auto-include for me. It can tarpit against certain deathstars, it can be my Warlord (thanks, Iyanden!) to make that objective more difficult for my opponent, as well as getting access to some handy traits. It's also a great counter assault if your opponent is too aggressive, when it can jump over and throw down some Str 10 AP2 melee!The Hawks, in addition to their main role of clearing cheap infantry, can help out against high armour vehicles too- with haywire, fleet and a 12" move they actually control a good section of the board, along with the Wraithknight. The Hawks can also fill some other roles: they can use their precision deep strike to snipe out key models, particularly in small units and they can deep strike onto TacOs or claim objectives at the end of the game.
Finally, the elephants in the room- the Wave Serpents. One for Fire Dragons, just to get some more anti-high armour into the list, and then a solid core of 4 more Dire Avenger Serpents. I went for Shuriken Cannons on these to help me really torrent down aggressive armies- each one will put out around 12 hits at str 6 or above within 24", enough to really rain the pain. Wave Serpents are amazing at dealing with light and medium armour, and they'll often be able to handle a couple of flyers as most of their firepower will be twin-linked.
I was slightly worried about the list's ability to achieve Tactical Objectives or make a late game Objective grab without any jetbikes, but 5 Wave Serpents should be able to dominate well enough that I don't need to, especially as 4 of them have Objective Secured. I can also achieve all of the Seize Ground, Purge and Annihilation style TacOs fairly easily, and they're often more valuable than "Secure Objective X" anyway.

So, these are the thoughts behind my 1650 GT Eldar list. I'm looking forward to the event now, and getting to put it to the test against some of the UK's top players. If you've got any thoughts about the list, if I've missed anything or you've got any improvements, please let me know beneath!

The next post in the Road to the GT series will focus on some popular tournament lists, and how to deal with those matchups.

Thanks for reading!

SimonW

Wednesday, 3 September 2014

Warhammer 40k Battle Report: Eldar vs White Scars, 1650

Welcome to my inaugural battle report on Back In The Box!

This game was 1650 points, as a practice match for the first UK 40k GT heat, held in Cardiff at the end of September. We played mission 4 (mission pack here)- the primary mission was Eternal War: The Relic, the secondary mission was Maelstrom of War: Spoils of War, and the tertiary mission was to achieve as many of First Strike (kill a unit in your own first turn, achievable by both players), Slay the Warlord and Linebreaker as possible. The primary mission is worth 10 tournament points to the winner, the secondary is worth 6 TPs, and the tertiary is worth 4 TPs to whoever achieves the most out of the three objectives. If you draw any of the missions, you each score half the points.

I'd also like to apologise for failing to live-tweet the game via my blog's twitter account. I thought it would be a good idea, but the mysterious Dark Gods of mobile internet decided that it was not to be and I wasn't able to post anything from my gaming club. I'll try again in future, but this could be a recurring problem.

I used a list I've been working on for a while, that I plan to use at the heat- essentially it's a "serpent spam" army, but with some variation in the supporting elements. I'll do another post discussing the list in more detail soon.
Primary Detachment: Combined Arms Detachment
Faction: Iyanden Eldar

HQ:
Autarch, Scorpion Chainsword

Troops:
5 Dire Avengers, Wave Serpent, Twin-Linked Scatter Lasers, Shuriken Cannon Upgrade

Elites:
5 Fire Dragons, Wave Serpent, Twin-Linked Scatter Lasers

Fast Attack:
6 Swooping Hawks

Heavy Support:
Wraithknight (Warlord)
Night Spinner
Night Spinner

Drew, my opponent, has a beautiful White Scar bike army. I asked him to bring the "classic" tournament style army, specifically including the so-called Bikestar command squad. He obliged, and then some!

Primary Detachment: Combined Arms Detachment
Faction: Space Marines (White Scars Chapter Tactics)

HQ:
Chapter Master,Thunder Hammer, Shield Eternal, Artificer Armour, Bike, Auspex
Khan, Moondrakken (Warlord)
Command Squad, Bikes, Apothecary, 4x Grav Gun

Troops:
5 Bikes, 2x Grav Gun, Combi-Grav
5 Bikes, 2x Meltagun, Combi-Melta

Fast Attack:
Stormtalon Gunship, Skyhammer Missiles

Heavy Support:
Thunderfire Cannon
Thunderfire Cannon

Ouch! That's a solid alpha strike army, well supported with the Thunderfire Cannons (TFCs) and Stormtalons. If I went second, I felt like this could really sting.

We rolled warlord traits- I chose strategic for the Wraithknight, and with the re-roll for a Combined Arms Detachment managed to get Master Of Ambush (Warlord +3 non-vehicle units get Infiltrate)! This is one of my favourite traits, as it allows me to counter deploy the Wraithknight and 3 of my Wave Serpents (although it specifies non-vehicle units, if a unit with Infiltrate deploys inside a dedicated transport, they may Infiltrate along with their transport, BRB page 167). Here I chose the orange Fire Dragon Serpent, and the red and pink Dire Avenger Serpents, to Infiltrate, along with the Wraithknight. Drew had to settle for Khan's Champion of Humanity trait to get his crucial scout moves.

I won the roll to select sides and deploy first, and split my forces reasonably evenly between the 2 corners of my zone. Drew set up in a fairly broad line- TFCs at each end, Bikestar in the middle and 2 troop squads either side of it. After Infiltrate and scout moves, the board looked like this:


The Wraithknight is hiding away from grav guns in the bottom right corner, along with a yellow Dire Avenger Wave Serpent (also with the Autarch) and purple Night Spinner. The red, green and pink Dire Avenger Serpents are in the bottom left, along with the orange Fire Dragon one and the blue Night Spinner. The Bikestar is the bike unit in the middle ruins. The TFCs are in the buidlings at either end, both of which are reinforced, and the grav bikers are the squads at either end. The first melta squad is next to the relic marker, and the second is behind the Bikestar. 

I took first turn to try and get as many bikers down as I could, then Drew rolled to seize... and did!

White Scars Turn 1
Drew moves one bike squad onto the relic, turbo boosts the far right squad across his board edge, and advances everything else towards my vehicle cluster.
Drew's shooting begins with his Orbital Strike, using the Targeting Relay objective to re-roll the scatter dice and catch 4 of my vehicles! My Wave Serpents weathered the storm pretty well, with poor rolling and serpent shields protecting against any real damage. However the Night Spinner fared less well and suffered a penetrating hit followed by an Explodes result! First Strike for Drew! The Bikestar couldn't see the primary target (green Falcon Serpent) though, so that wasn't so bad. The grav bikers in range shot at the red Wave Serpent which declined to Jink- I reasoned that even immobilised I'd still have plenty of firepower and I didn't think he'd get 2 grav results. As it happened, the bikers fluffed their shooting even with the combi-grav, and did no damage. The melta bikers shot at the orange Wave Serpent containing the fire dragons- again I didn't Jink, and again I suffered no damage. The Thunderfires tried to chip some hull points from my tank cluster, but to no avail. Finally he turbo boosts the squad carrying the relic back 6".
Drew achieves a Tactical Objective (TacO) too, securing objective 3.


The Blue Night Spinner has died, and Bikestar is strung out to make use of a Targeting Relay mysterious objective. A melta bike squad has the relic and is trying to hide behind the bunker, while a grav squad turbo boosts across to get into the fight next turn.

Eldar Turn 1
That went... surprisingly well! Not nearly as bad as I'd thought. I still had most of my firepower and could bring almost all of it to bear.
On my left flank, the red Wave Serpent moved up 6 and dropped off the Dire Avengers. The green Wave Serpent (that looks like a falcon...) did the same, as did the orange Serpent with the Fire Dragons. The pink Serpent decided to keep its cargo for now, as they didn't have too much to do, but it also moved 6 to be able to fire all 3 weapons at full BS. Over on the right side, the Wraithknight advanced to just shy of 30" away from the grav melta bikes holding the Relic, thinking they were grav guns instead. The yellow Wave Serpent advanced a full 12" to get the scatter lasers in range of the command squad, and the remaining Night Spinner followed behind.
The shooting phase starts with the Night Spinner trying to barrage-snipe the biker holding the relic, but to no avail. Then the left flank opened fire. The red Dire Avengers shot at the grav bikers near the board edge, doing no damage. Then the fire dragons battle-focused towards them and forced Drew to Jink with his squad. The dragons only killed 1 biker, but crucially forced the grav guns to snap fire next turn, so I was happy. The bottom squad of Avengers battle focused to shoot at the melta bikers, killing 1. Then the wave serpents opened fire. The pink Serpent also shot at the melta bikers, killing off 3 more so that only 1 remained. The red, orange, and green Serpents all shot at the command squad. (NB- the GT we're attending ruled the serpent shield as a hull mounted weapon with a 45 degree total firing arc. However, you're allowed to choose the point of the hull on which you draw the arc from, meaning I was able to keep the tanking chapter master out of arc for the shield on the red Serpent). The yellow Serpent was also able to shoot into the squishy back of the squad, along with the Wraithknight (who forced them to Jink). After the dust settled, the chapter master was down to 1 wound, and just Khan and the Apothecary had survived out of the rest of the squad!
I was reasonably happy with my first turn. however as I failed to kill an entire unit, I didn't manage First Strike. Also worth noting is that Drew had "Secure Objective 4" as a TacO, and due to the Seize the Loot special rule, I was able to steal it from him.

The Bikestar is out of coherency in the middle. It is heavily damaged and the Chapter Master has taken 3 wounds. Next to it is a single combi-melta sergeant, who has also Jinked. The far left bike squad has grav guns, and has also Jinked.

Turn 1 summary-
Primary Mission: 5-0 White Scars
Secondary Mission: 1-1
Tertiary Mission: 1-0 White Scars

White Scars Turn 2
Drew's firepower was quite reduced here, having jinked multiple squads. However he still has the relic, which he continues to drag and turbo boost towards the corner. Both the Stormtalons arrive this turn, ensuring he still has considerable firepower. He positions them well, ensuring they both have shots on multiple targets. The command squad position to launch a multiple assault on the Dire Avengers and green Serpent, needing more than 5" but less than 9" to get the assault to work properly. The jinking grav bikers on the left decide to hide in combat with the Dire Avengers, while the squad near the board edge moves up to shoot the Fire Dragons.
Drew starts by shooting the TFCs, reducing the orange Serpent to a single hull and chipping another from the pink one. The 1st stormtalon shoots the red Serpent, stripping a hull point and forcing snap shots. The lone biker attempts to combi melta the orange serpent, but misses. The 2nd stormtalon then kills the wounded orange Serpent, denying the lone biker an assault. The far left grav squad forgo shooting, while the middle squad annihilates 4 of the fire dragons.
In the ensuing assault phase, Drew kills 3 Dire Avengers on the left who then pass their Ld 6 morale test, letting Drew hide in melee for a turn. The command squad however roll double 6 on the assault, and with the 7th Edition multi-assault rules they all had to engage Dire Avengers! Naturally the Avengers were butchered, but now the damaged Bikestar is out in the open and vulnerable...
Drew didn't manage to achieve any TacOs this turn- they were quite difficult ones, so he rightly focused on killing more stuff.

The Stormtalons arrive and Drew wrecks the orange Wave Serpent with one, the other forcing my red Serpent to Jink. The squad with the relic near the middle of his board edge continue to move away from me. The Bikestar, near the green Serpent, rolls too high to launch its multi-assault and is forced to solely engage the Dire Avengers.

Eldar Turn 2
I decide that the red Serpent, being forced to make snap shots anyway, will shoot a Stormtalon. My swooping hawks arrive and decide to try and drop the biker holding the relic, slowing Drew down, but one of them dies to dangerous terrain on landing and the resulting small blast does no damage. The Night Spinner plans to try and snipe the relic carrier, while the yellow Serpent aims at the fresh grav bikers. The green and pink Serpents both aim at the Bikestar, while the pink Avengers debark and aim at the fresh grav bikers too. Finally the Wraithknight advances towards the melta-wielding relic squad, hoping to pick up the relic as soon as he can.
The shooting phase rolls around again, and the 2 wave serpents make quick work of the damaged Bikestar for Slay the Warlord. The Night Spinner manages to barrage snipe the relic holder successfully, then the hawks try to put some more damage into the squad. They do 5 wounds on 15 shots (despite needing 6s) and then Drew fails 4 saves, wiping them out! Swooping Hawk power! The yellow Serpent combines with the pink Avengers to force a morale check on the grav bikers, who then fail and flee 13" off the board by a hair's width! This turn is going very well for me so far. To top it off, the red Serpent destroys the first Stormtalon with a 7-shot Serpent Shield Spike (try saying that after a few drinks) and the Wraithknight discovers he is claiming a Skyfire Nexus and strips a hull point from the other Stormtalon.
Finally in the assault phase, the Dire Avengers and bikers both derp at each other, doing no damage and then Drew fails his Hit and Run check. The lone Fire Dragon also tries to assault the lonely biker after failing to fusion him, but this turns into a bad idea when neither of us wound and Drew Hits and Runs 13" behind the green Serpent. Oops...
On the TacO front, I am able to score Supremacy (hold 2+ markers and twice as many as your opponent) for 2pts and Assassinate (kill a character) for 1pt.

The Swooping Hawks combine with the Night Spinner to kill all 5 of the relic carrying squad! Pew pew! My Wraithknight advances towards the middle, and the Bikestar is destroyed. The Fire dragon is left on his own after the lone biker near my board edge Hit and Runs behind a Serpent.

Turn 2 summary-
Primary Mission: 0-0
Secondary Mission: 4-1 Eldar
Tertiary Mission: 1-1

White Scars Turn 3
Things aren't looking good for Drew- he has a bike squad locked in combat, a single bike sergeant with meltabomb, and a snap firing stormtalon. He does have the two TFCs as well, so can continue to chip away at my vehicles.
He does so in the shooting phase, the pink Serpent dropping to a single hull point from the first TFC, and with some clever blast placement Drew also nails 4 Dire Avengers with it, and the survivor is pinned. Meanwhile the snap-firing stormtalon simply forces my red Serpent to Jink- as it is shooting at a plane next turn, Jinking has no downside. One TFC scatters wildly onto the swooping hawks and kills 2,
In the assault phase his meltabomb sergeant immobilises the green Serpent while the bikes and Avengers once again stay locked in melee.
He doesn't manage any more TacOs, using his remaining units to inflict damage instead.

The remaining Stormtalon is just in the bottom left corner. Drew failed to Hit and Run with the bikers engaged in melee on the far left. The TFCs continue shelling tanks, and one scatters into the pink Dire Avengers, killing 4!

Eldar Turn 3
The hawks jump to the sky, ready to grab the relic. The Wraithknight moves towards the TFC in the far right corner, hoping to limit any return fire. The serpents line up shots where they can, the red one aiming at the remaining stormtalon so that he doesn't suffer too badly from being forced to snap fire. My shooting is quite quiet this turn- the TFC on the left passes the few saves I manage to inflict. The last fire dragon aims at the last biker again, but Drew's 3+ Jink save ensures he survives. I then battle focus onto the objective, hoping to control it for more Secondary points. Of note is the red Serpent, who wrecks the Stormtalon, which then crashed onto the bikes/Dire Avenger Combat, killing a biker! Just as planned...
In the assault phase, the sergeant auto-hits the green Serpent with a meltabomb, and in the ensuing explosion wipes out the Fire Dragon! The other bike squad Hit and Run out of combat. Meanwhile the Wraithknight slaps down the Techmarine gunner, but as it's at initiative 1 the plucky Techmarine hits and wounds twice with the servo-arms! Only 4 wounds left...
By killing the Stormtalon this turn, I get the "Scour the Skies" TacO for another Secondary point.

My Wraithknight punches out the right hand TFC, while my vehicles line up shots as best they can. The bike squad next to the pink Serpent hide in melee then escape with Hit and Run at the end of the turn, denying me any shots at them. The lone biker at the bottom Explodes the green Serpent, and the resulting blast wipes out the last Fire Dragon!

Turn 3 Summary-
Primary Mission: 0-0

Secondary Mission: 4-1 Eldar
Tertiary Mission: 1-1

White Scars Turn 4
Drew's 4 remaining Bikers and final Thunderfire begin to realise that they are not long for this world, so try to go out in a blaze of glory. The bikes position themselves between the red and pink Wave Serpents, then they open fire! The red Serpent is downed by a lucky TFC shell after failing its Jink save, while the pink Serpent is destroyed by both units charging and covering it in grenades and meltabombs!
Drew can't do any TacOs this turn, as he's too busy blowing up Wave Serpents...

Drew gets some well-earned revenge, nailing the pink and red Wave Serpents in a single destructive turn...


Eldar Turn 4
Despite losing 3 serpents since my last turn, I am still pretty confident. The hawks precision deep strike onto the relic, and despite one of their number dying to terrain (again), they keep hold of it. Their grenade pack also nails another biker when they arrive. Hell yeah! The Wraithknight hops towards them, hoping to be handed the relic ASAP. I line up a torrent from the Night Spinner on the two bikes, while my 2 remaining Avengers get ready to try and bladestorm any survivors, along with the yellow Serpent.
My shooting is fast and effective- I kill off the 2 remaining bikers from the squad, leaving Drew on 1 biker sergeant with a meltabomb, and a TFC.
I believe I achieved more TacOs this turn, but honestly I can't remember as it was getting late. I also get into Drew's deployment zone, ready to score Linebreaker.

I forgot to take a picture this round- sorry! Just imagine some Swooping Hawks on the relic in the picture above, and 3 less bikers in the squad of 3...


Turn 4 summary-
Primary Mission: 5-0 Eldar
Secondary Mission: 4-1 Eldar
Tertiary Mission: 2-1 Eldar

White Scars Turn 5
By now the game is almost over. Drew tries to kill the Hawks holding the relic, but the TFC scatters wildly and the biker's bolter fails to breach their armour.

Damned servo-skull, forgetting to take all of these pictures! It'll be fixed by next time...


Eldar Turn 5
I move the Wraithknight next to the hawks and pass him the relic (making sure to walk to avoid dangerous terrain), then shoot the remaining biker and wound the TFC. At this point we call the game, as Drew has 1 Thunderfire Cannon left and no way of realistically harming my Wraithknight, who now has the relic.

The scene at the end of the game- my Wraithknight is holding the objective and Drew doesn't have the tools to take it from him. The last biker was just in front of the yellow Wave Serpent. We don't roll for turn 6, as the game is essentially over.

Final Summary-
Primary Mission: 5-0 Eldar
Secondary Mission: 4-1 Eldar
Tertiary Mission: 2-1 Eldar

Final Score: 20-0 Eldar
(10TP for winning the primary mission, 6 TP for winning the secondary mission, 4 TP for winning the tertiary mission).

Victory for Craftworld Skittles!
That was a tough test for the list- scouting bikes are never fun to play against, and I was really worried after Drew seized on me! However the sheer volume of firepower from the Wave Serpents was disgusting at times, kicking out 10 hits on a slow turn, all at str 6+! The Dire Avengers pitched in too, the threat of Bladestorm encouraging Drew to Jink, thus limiting his firepower. MVP has to go to the Swooping Hawks though- they're one of my favourite units, and they never fail to perform! I hadn't originally planned on including them, but for less that 100pts they're an absolute steal.
I originally planned to ally an inquisitor with 3 servo skulls into the army as my second detachment, but decided that the extra firepower of 4 shuriken cannons would be more valuable as long as I could still do well in this matchup, and I think this game shows it can. The white scar alpha strike was strong, but not so hard that I couldn't bounce back. I'm always impressed by my army's ability to withstand enemy alpha strikes, and then deliver one back!

I think one of the key things I improved on this game was not Jinking as often as usual- in the first turn, I was ready to suffer some immobilised results if it meant getting all of my firepower in return, and it really paid off! Drew was a bit more cautious, Jinking with most of his units, and I think that cost him quite a lot of firepower. It's one of the biggest changes from 6th edition to 7th in my eyes, and it's tricky to get the hang of deciding when to Jink or not. Sometimes it can mean losing an extra hull point or a couple more bikers, but it can often be worth the trade.

Overall I really enjoyed the game, and certainly learned a lot about the White Scars matchup. I want to thank Drew again for being so sporting, and agreeing to play against my cheesy Serpent Spam list.

Thanks for reading my first battle report! There'll be more to come soon, and some articles too.
Next up will be a post on the thoughts and design process behind my list, followed by some strategy articles containing tactics you can use against some of the more popular tournament lists. Once again, feel free to comment on anything in the post or ask me any questions in the box below.

SimonW

Monday, 1 September 2014

An Introduction

Hello, and welcome to my new wargaming blog, Back In The Box (BitB for short)!

My name is Simon, I live in Cardiff, Wales and I've recently graduated from university as a statistician. I've played wargames for 11 years now, starting with a classic Games Workshop 40K demo game- no doubt like many others. I still play Warhammer 40,000 (40k) regularly and I'm also getting back into Warhammer Fantasy (WFB) again. Additionally, I play Fantasy Flight Games' X-Wing Miniatures game, and I'm looking to start Warmachine & Hordes (WMH) in the near future too.

In my time as a wargamer I've played many different forces: Necrons, Eldar, Dark Eldar, Black Templars, Chaos Space Marines, Orks, and Space Marines in 40k; Skaven and Wood Elves in WFB; and Imperials for X Wing. From my research into WMH, I like the look of the Legion Of Everblight, so they'll be the faction I start with. This blog will primarily focus on my Eldar, Wood Elves, and starting Legion of Everblight.

Since I started this hobby, I've always enjoyed the competitive side as well as the creative side. The past couple of years I've made more of an effort to attend several tournaments a year, including from last year the annual 40K GT in the UK. I managed to scrape through qualifying with my Necrons, then with my Beastpack Eldar/Dark Eldar I achieved a 10th place finish at the finals, which I was quite happy with. I'm hoping to qualify again this year, and I'll be at the first heat in Firestorm Games, Cardiff, as it's closest to where I live.


What I normally have to say to my Dire Avenger squads after the Wave Serpent dies...


I decided I wanted to start blogging after many discussions with my friends, to give myself an outlet for my myriad ideas, thoughts and theories about this hobby. So what will I be posting about? Well the main thing I aim to do is write up all my weekly games as battle reports, alongside live tweeting them on the BitB Twitter account here, as well as blogging about any tournaments I attend. I'll also try to cover any major wargaming news stories too.
For 40k, I'm going to do a "Road to the GT" series building up to the first heat on the 27/28 of September, with some list analysis and theory, then hopefully I'll follow that up with a "Road to the Finals" series if I manage to qualify again. For WFB, I'll be charting my progress in picking up the game once more, in addition to the battle reports and live tweets. I plan on a similar series for WMH, around my experience learning a totally new system. I'm not playing so much X-Wing currently, but I'll hopefully be able to get a few games and articles in nonetheless.

I'll try and get some pictures of my Eldar army up over the next few days, along with the first battle report!

Well that concludes my introduction! Thanks for your time, and I hope you enjoy reading the blog as much as I do writing it. Naturally feel free to comment on any of the posts!

SimonW