Showing posts with label Battle Report. Show all posts

Friday, 5 December 2014

Warmachine/Hordes Battle Report: 50pts Legion vs Cygnar

Over the past couple of month I've been playing a bit more Warmahordes, and at 50pts too. A couple of weeks ago I had a pick up game against Chris and his Cygnar, inlcuding a Colossal that absolutely dwarfed everything else on the board!

Lists

Chris had the following Cygnar list (my apologies for the inaccurate nature, I don't know Cygnar very well):

Stryker2
Stormblade-type warjack
10 Stormblades
UA and Standard
Electric Gun UA
Captain
Journeyman warcaster
2 Solos that combo'd with the Stormwall for some lightning triangle
Stormwall
Squire
The Black 13th


I was using a modification of my Thagrosh2 list from last week:

Thagrosh2
Succubus
Shepherd
3 Shredders
Harrier
4 Raeks
Angelius
Scythean
2 Deathstalkers
2 Forsaken

Many beasts and support solos! There is good synergy with  well with


 Deployment
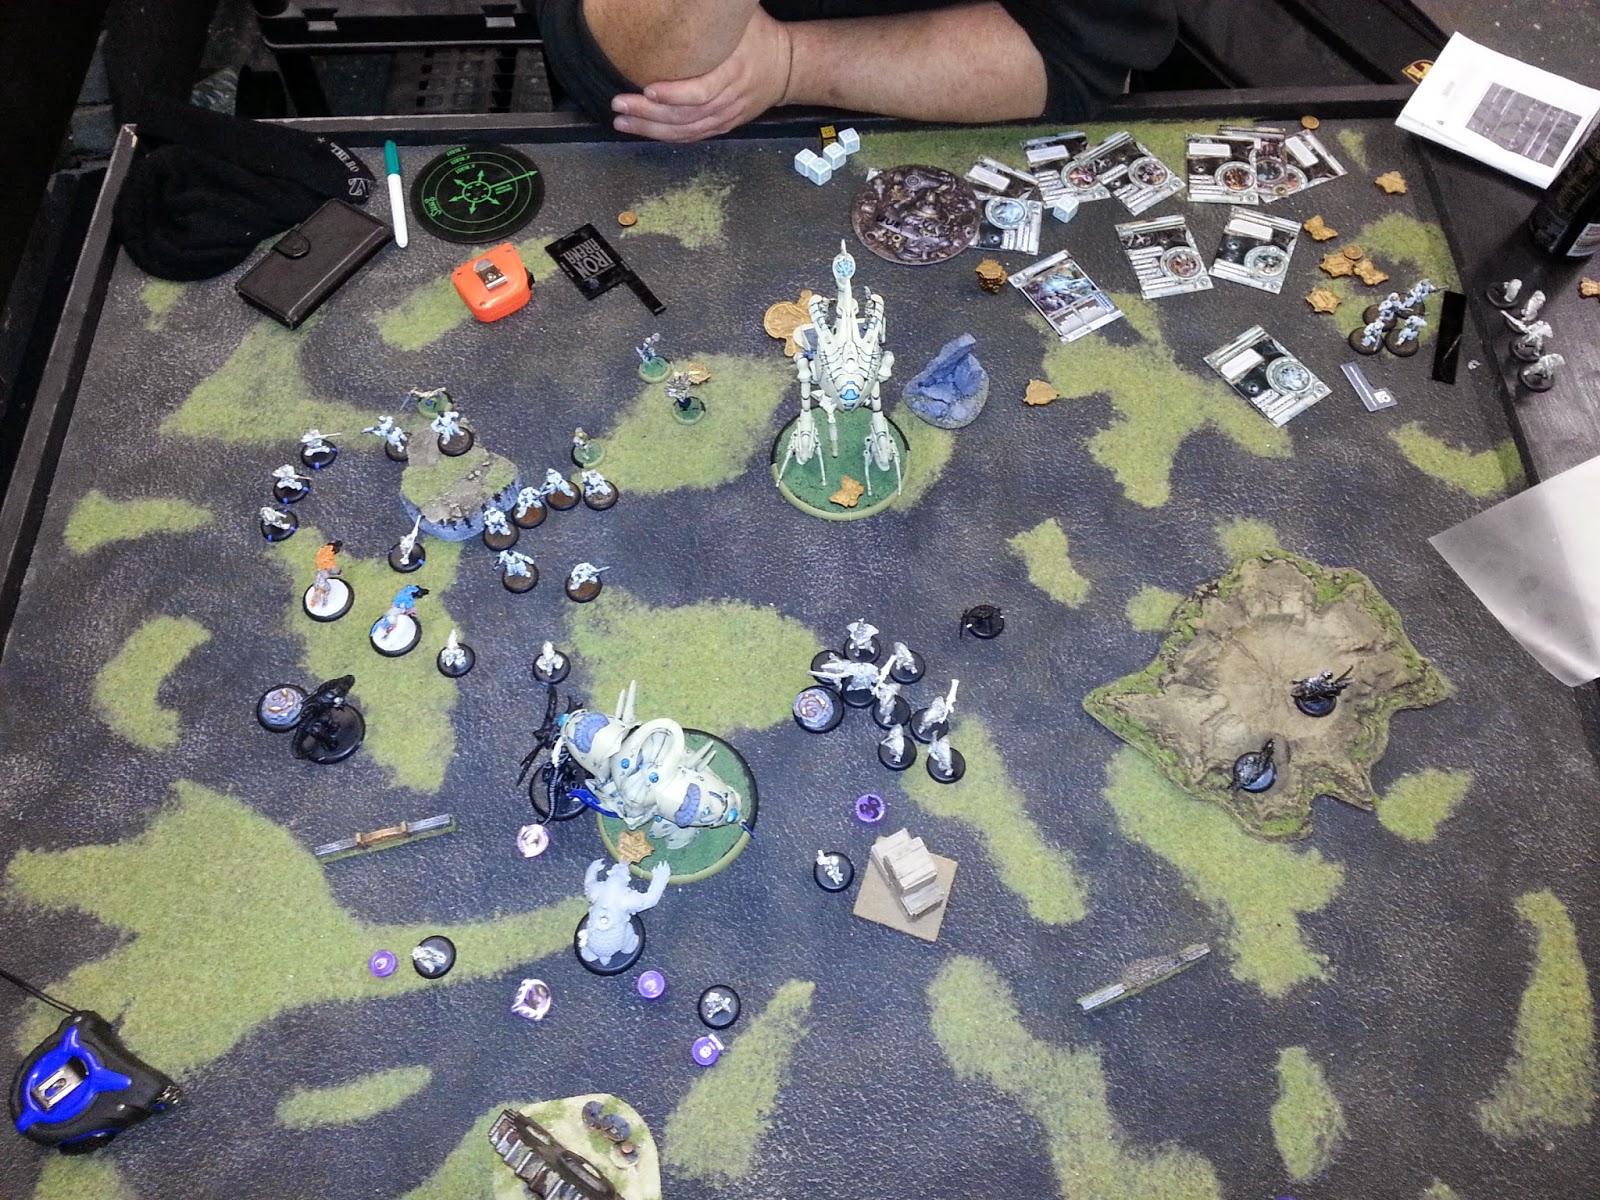
Chris won the roll-off but gave me first turn. He said afterwards this might have been a mistake, as it allowed me to set up my threat ranges first. I set up in a pretty standard line- the left hand Scythean model was a proxy for the Angelius. My Deathstalkers advance deploy on the left, while his Stormblades advance move closer to them.


Legion Turn 1I moved up ready to threaten in a "reverse-delta" formation that tried to keep out of threat range of his Stormwall. I don't have anything in range, despite my Advance Deploy Deathstalkers or his Advance Move Stormblades.


Cygnar Turn 1
Chris advances quite uniformly, and lays down some POW 12 AOEs that remain in play. His Stormblades push towards the Deathstalkers, hoping to make a play for my Objective and Flag.


 Legion Turn 2
I took a long time deciding what to do this turn, and looked very carefully at my threat ranges. In the end I sat back, deciding not to advance and feat just yet. This meant I'd have to weather some shooting next turn, but I wouldn't have to take free damage from the AOEs and I wouldn't be able to get very deep into his lines anyway due to the dense formation Chris was using. The Deathstalkers were able to start making a mark though, their Sniper ability bypassing his high armour and with Snap Fire I was able to kill 4.


Cygnar Turn 2 Onwards
In Chris's turn, he feated with Stryker2, and pushed up into my force with his stormblades and jack, while Stryker himself hid behind the colossal. Chris was able to kill 1 Raek, reduce another to 1 health, and knock an aspect off the Angelius. Fortunately most of my army was still alive, and Thagrosh had enough Fury available to heal all the damaged aspects.

In my third turn, I counter-assault with my own feat. A shredder goes crazy, and hits the 'jack for more than 20 boxes with Rabid, Manifest Destiny and the feat. My Scythean and Angelius team up and lay the smackdown on the colossal. The Scythean charges first and hits with both initials, triggering Bloodbath to kill the Witch Hunter and a Stormblade as well. It then bought 3 more attacks, which knocked out the whole of the left side and made a start on the right. The Angelius followed up by hitting 14 damage on the Armour Pierce, then buying another 2 attacks to finish it off. Stormwall down!

The rest of my forces also activate and start to clear out more of Chris' army, but by this point the store was closing so, with some independent advice we called it there as a victory for the Legion of Everblight!


After Action Thoughts
I wasn't sure how I'd do against the Colossal, but the Scythean tore through it pretty fast and the Angelius finished off what was left, almost without difficulty. I think I'm starting to see the reason people don't use Raeks so much, as although with Stealth, Def 15 (16 with Tenacity) and the awesome Leap, they unfortunately don't have a very high damage output, especially when they can't boost during the feat. I might swap a couple out for another heavy beast, perhaps a Neraph, as I'm interested to see what it can do.

Chris was really friendly throughout the game, and explained all of his models' abilities and interactions really clearly. We'll have to have a rematch one day and get to the end! Thanks again for reading, and sorry for the delay in posting this game compared to when it was played.

SimonW

Warmachine/Hordes Battle Report: 50pts Legion vs Retribution of Scyrah

Last week I played more Warmahordes- Marc is one of the most experienced players at my club, so I was looking forward to the valuable experience I could get from our game. Although he has several faction, Marc was using Retribution of scyrah- Steampunk Elves!

Lists
Marc's list:

Issyria, Sibyl of Dawn - WJ: +6
-    Sylys Wyshnalyrr, The Seeker
-    Hyperion - PC: 18
Arcantrik Force Generator - PC: 10
Arcanist - PC: 1
Dawnguard Invictors - Leader & 9 Grunts: 10
-    Invictor Officer & Standard - Officer & Standard 2
-    1 1 escort's: 1
Dawnguard Sentinels - Leader & 9 Grunts: 9
-    Sentinel Officer & Standard - PC: 2
-    1 1 escort's: 1

My list:
Thagrosh2
Scythean
Angelius
Neraph
Raek
Raek
Shredder
Shredder
Harrier
Strider Deathstalker
Forsaken
Forsaken
Strider Blightblades

I had a small mix-up with my case this week, so I had quite a few proxies- Thagrosh2 was being played by the giant bear, the Neraph was played by the blue troll, and the unit of 6 small based troll infantry played the Blightblades. Woops! Fortunately for me Marc didn't mind at all.


Deployment 
I won the roll off and took first turn. Marc pre-deploys the 2 huge bases, and then I line up on the 7" line. I put the Raeks to threaten one side, and the 2 Deathstalkers for the other, assuming he'd set up 1 infantry squad either side. The 3 heavies went more or less down the centre, ready to try and smack some damage onto the colossal.


Round 1
I advance to what I think is just outside of Marc's threat ranges, and it is. I'm pretty happy with most of my positioning. The objective on my right disappears.


Legion Turn 2
I push forward, but don't feat as I can't see how it will help me kill much stuff. I get my Angelius onto one objective and the Neraph on the other, with a Harrier contesting too. The Blightblades make their move, jamming or killing a load of Marc's shooty elves on my left. The Raeks push up to block some lanes to stop Marc contesting the objective, so that I should be able to score at least 1 point in his turn.


 Retribution Turn 2
Marc has a charge with Hyperion into Thagrosh2- oh dear. He starts by knocking him down with the Battle Engine, for 7 damage. I decide against the transfer and pop out a shredder to block the charge lane, forcing Marc to clear it with the rest of his shooting. He manages though, and the colossal barrels into Thagrosh2! Luckily I have a camp of 4 fury, and due to the way Marc's damage spikes occur I am able to take 1 attack and transfer all the others out without killing any of my own beasts! However a Raek is reduced to 1 health, and my Angel loses an aspect.
In other news, Marc's Weaponmaster infantry use their Vengeance move to charge the Neraph, who dies quicker than you can say "I should be another Scythean". The Harrier is contesting the flag as planned though, so I take a 1-0 lead.


 Legion Turn 3
Feat turn! I reave back to 7 fury with Thagrosh, spend 1 to stand up (however I am already in melee, so I forget to move up closer and extend my threat range for feat/Manifest Destiny), spend 2 healing the Raek back to 3 health, a 4th fury to heal the aspect on my Angelius, and my last 3 to cast Manifest Destiny- it's do or die time! My Scythean goes apeshit on the colossal and removes the shield, and its entire right side, and starts on its left side. The Angelius swoops in but unfortunately derps on the Armour Pierce attack, and the 2 Shredders also try and take a bite but don't do a huge amount, meaning I'll have to kill it on my feat turn. One Raek and the Blightblades make even more of a mess of the shooting unit, jamming them further and killing another few. The other Raek tries to get in range for a boosted Headbutt on the caster, but due to not moving up with Thagrosh2 I am just out of range at the very edge of his control area. I try a tail attack but it does no damage, and the second fails to hit. The Deathstalkers continue to ping away at the Weaponmasters. With the feat, I am able to kill Hyperion- unfortunately Thagrosh2 is just short of boxing it himself to create a cover cloud. I put a Raek and the Angelius into the Weaponmasters as well, trying to prevent the assassination. A Forsaken bombs them too, but can only kill 1 of them, needing 10s.


Retribtion Turn 3
Marc goes for the assassination as I have no transfers and only about 10 boxes left. He puts on "Blinding Light" with his caster, then goes for D3+1 shots from the Battle Engine... and scores 4. He doesn't even need the 4th, the first 3 doing enough to take down Thagrosh2 and win the game! I was able to get a second control point with the Forsaken, but it's nowhere near enough.

Defeat for the Legion of Everblight!


After Action Thoughts
Another Colossal, and a Battle Engine too! Although I didn't target the Battle Engine, I did manage to take out the Colossal without too much difficulty.
I made a few small mistakes, putting the Neraph in a poor position and losing it cheaply, and not killing the front ranks of the Weaponmasters to decrease their threat range, and one that proved pretty major- I should have pushed Thagrosh2 in closer to the colossal and extended his control area for the feat/Manifest Destiny for the assassination run, and I should have attacked with him later in the activation when the colossal was more damaged, so that I could box it with his magic weapon and create a cloud to prevent him from being seen next turn. Still, I think I learned from these mistakes, so they weren't in vain.
Marc was very generous, explaining rules whenever I needed and even allowing me to take back decisions I realised were mistakes several times. Marc gave me some great advice too, about both the playstyle and the list. After our chat I think that the Neraph wasn't up to much and with Manifest Destiny, the auto-hitting ability of the Tail attack is not that useful, and will probably trade it and the Harrier out for another Scythean to give me some more hitting power.

Thanks again for reading guys! I haven't played any 40k in a while, but I've got a game arranged soon and will be testing out a new Eldar army I've been thinking about!

SimonW

Tuesday, 25 November 2014

Warhammer Fantasy Battle Report: Wood Elves vs High Elves, 900pts

This week I played a Warhammer Fantasy game for our club's escalation league, against Jay and his High Elves. It was painting score week again, but sadly I wasn't able to finish anything, and as we only get points for fully painted and based stuff I didn't get any more painting points. However, I could still get some more playing points!

Lists

Jay

Loremaster of Hoeth
10 Sea Guard
10 Archers
20 White Lions
2 Repeater Bolt Throwers

Some good artillery and shooting, backed up by a tough combat block!
I would have to kill the bolt throwers fast before they could cut apart my infantry, and I needed to keep well away from the White Lions.
I was using:

Spellweaver, Level 4, Dispel Scroll, Obsidian Lodestone, Elven Steed
5 Sisters of the Thorn
15 Glade Guard, Trueflight Arrows, Musician
2x 5 Deepwood Scouts, Hagbane Tips
5 Waywatchers
Great Eagle

Magic: Jay's Loremaster had all 8 signature spells from the rulebook.
My spellweaver had Hand of Glory, Soul Quench, Drain Magic, and Walk Between Worlds. The Sisters had Curse of Anraheir and Shield of Thorns.


Deployment
Jay was deploying first, and set up his bolt throwers last to ensure they could see all my units. However after scout deployment and vanguard moves I felt a bit safer- the Waywatchers scouted in the corner, while both units of Hagbane scouts went on the other side. Jay won the roll off, took turn 1.


High Elves Turn 1
Jay pushes forward with the White Lions and Archers. One bolt thrower faces the Waywatchers, while the other looks to team up with the Sea Guard and shoot the Scouts. His shooting isn't great though, and he only manages to kill 2 Scouts due to the heavy modifiers. He also fails to wound with both the hits on my Waywatchers! The Winds of Magic are 3+1, so Jay puts all his dice into Wildform on the White Lions, and I succeed in putting all my dice to stop it.


Wood Elves Turn 1My Eagle lines up a charge on a Bolt Thrower, while the 8 remaining poison scouts do a wound to the other, The Waywatchers wound the one ready to face the eagle. The Trueflight arrows manage to pierce the Loremaster's armour twice, as he was on his own. My magic phase is similarly uneventful, with all 3 of my dice going into Soul Quench on the Archers, which is dispelled.

Wood Elves Turn 2 Onwards
In the High Elves turn, Jay reformed the archers to try and shoot the Waywatchers next turn (as they had no musician so couldn't perform a Swift Reform). The White Lions failed a 10" charge into my Trueflight Glade Guard, taking 2 casualties for their efforts. The Sea Guard tried to shoot the scouts, and killed one (needing 7s to hit!), and the 2 left panicked. One Bolt Thrower took 2 wounds from the Eagle, while the other was unable to hit my Scouts. Jay's magic phase was eventful- we had 9 vs 6, so he started with Wyssan's on the White lions, which I let go, followed by a 3 dice boosted Fireball on my Sisters. He managed to cast it irresistibly, but due to my 2+ Ward vs magic I was okay. On the resulting miscast, he suffered a Dimensional Cascade! Although he survived the Str 10 hit even with 1 wound remaining, he didn't survive being sucked into the warp!
In my turn, the scouts didn't rally. However the others killed a bolt thrower, which panicked the Sea Guard. I got a strong magic phase, 10 vs 5, and was able to cast Soul Quench on the Archers to kill 1, Hand of Glory on the Waywatchers who killed another 8 Archers, as well as Drain Magic and Curse of Anraheir on the White Lions. The Trueflights and Blackbriar Javelins killed 5 more White Lions. In other news, the Eagle charged the bolt thrower, and the remaining elf crewman hit and wounded, slaying the bird!

Unfortunately Jay had to leave early, so we decided not to start another turn. However Jay didn't have too much left due to some unfortunate rolls, so he conceded to the Wood Elves. Athel Loren 1, Ulthuan 0!


After Action Thoughts
I loved the Waywatchers this time, and Hand of Glory on them is awesome. I much preferred this list to last week's, and the poison scouts were solid too. The Eagle again wasn't great, I think I need more experience playing it. Jay left his Loremaster out of a Unit due to having rolled a Dimensional Cascade on his Wizard the last 4 weeks in a row, and unfortunately his paranoia was proved valid as it happened again!

Next week we're going up to 1200pts- I'm thinking another Eagle, and some more Trueflight Glade Guard to split the unit into 2x 10. I also want to try out a Branchwraith, with Lore of Undeath, for some shenanigans! With the remaining 90pts, I think I'll get a musician (or maybe a standard) for my Sisters and a 3rd unit of Hagbane Scouts.

That's it for the battle report. A quick apology- I'm sorry several of the games have had to end early recently, resulting in much shorter reports, and also that my picture-taking has been lax; I'm endeavoring to play a full game soon though! I also played a Warmachine/Hordes game last week that will be posted soon :)

Thanks again for reading!

SimonW

Sunday, 16 November 2014

Warmachine/Hordes Battle Report: 50pts Legion vs Trollbloods!

Hello! This week I played my first ever 50pts game of Warmachine/Hordes, against Byron and his Trollbloods! I was excited to have a "tournament style" game at last, and I was pleased that it hasn't taken me too long since I started playing either. I used a different Warlock too, Thagrosh, Messiah of Everblight, as I was finding Lylyth to be a bit repetitive. I still don't have any units, but I'm not really sure what I need and as they're relatively expensive I'm holding back for now.

Lists

I had a new list, with Thagrosh2 (or rather Thagrosh2's legs...), and a whole load of beasts and support solos!

Thagrosh, Messiah of Everblight (+3)
Raek
Raek
Raek
Raek
Shredder
Shredder
Shredder
Harrier
Scythean
Scythean
Succubus
Forsaken
Forsaken
Strider Deathstalker
53pts

This list was focused on aggression, in a similar style to my Lylyth2 list, except all with melee rather than shooting. The Deathstalkers made it in to help clear charge lanes, but other than that the plan was advance strongly round 1, then charge turn 2 with Manifest Destiny and Thagrosh's Feat to hopefully assassinate the enemy caster, or do enough damage that I can win on attrition. It's quite high risk, but luckily Thagrosh can camp quite a few fury at once and he's not exactly short of transfer targets! I don't yet own any units, but it seemed like the list would be really fun to play!

Byron had the following:
Madrik Ironhide, World Ender (Epic)
Runebearer
Dire Troll Mauler
Impaler
Fell Caller Hero
Stone Scribe Chronicler
Trollkin Champion Hero
Krielstone Bearer and Stone Scribes (Leader +5)
Stone Scribe Elder (UA)
Pyg Burrowers (Leader +9)
Trollkin Champions (Leader +5)
Skaldi Bonehammer (UA)
Trollkin Fenblades (Leader +9)

Byron told me afterwards he was actually 1pt over, but I didn't mind- he was a very generous opponent, letting me take back a couple of mistakes and helping me throughout my activation.
I don't know enough about Trolls to really talk about the list in depth, but it was certainly very intimidating, with a huge number of models, many with multiple wounds and/or Tough, which turns dying into being knocked down on a 5+!

Scenario
I don't know the name, but there was 1 flag each side- you could dominate (caster base-to-base, no enemy in 4") your opponent's flage for 2pts, control (any model base-to-base, no enemy in 4") your opponent's flag for 1pt, or dominate your own flag for 1pt. There was also a "killbox", so the casters had to not be completely within 14" of the board edge after turn 1.

 Deployment
I lined up my stuff, spacing carefully to avoid the multiple Abominatons in my list causing too many command checks. I essentially went symmetrical- Thagrosh2 central, then Forsaken, Scythean, Lesser, Lesser, Raek, Raek, with the Succubus behind Thagrosh2. The Deathstalkers Advance Deployed on the left opposite some single wound infantry, hoping Tough Checks didn't hinder their Snap Fire/Sniper combo too much.
Byron countered by bricking up, his army forming a huge mass of Troll-flesh, with Madrak2 somewhere in the middle! The Pygs Advanced Deployed away from the Deathstalkers, planning to burrow early on.

Round 1
My stuff runs or walks forwards, using just enough Fury so I can manage it. My Deathstalkers are out of Range. Byron also walks or runs towards the middle, and his Pygs burrow so they can't be attacked.

Legion Turn 2 Onwards
In my 2nd round, Thagrosh2 activated, used his Feat and cast Manifest Destiny, camping the other 4 fury. 3 of the Raeks got Tenacity, and 1 of the Scytheans had Dragon's Blood as a free upkeep. My Deathstalkers killed one of the Fennblades and knocked another 2 down, so the Shredder and Harrier on the left went after the survivors. The 4 Raeks and 2 Scytheans all charged and made a big mess out of Byron's various infantry around Madrak, and then on the feat they were joined by 2 of the Shredders to attack Madrak himself who had no transfers, and only 2 Grim Salvation targets! 1 Raek didn't get in, and after all my extra Manifest Destiny attacks, Madrak was left on about 5 health! So close!
In Byron's turn, he also used his feat, so that each of his models can make a normal melee attack against everything in melee range. The Pygs arrived and decided to join in against the beasts, and between all his stuff Byron was able to kill both Scytheans, 3 Raeks and 2 Shredders! He was also able to pop a Forsaken.
Due to the immense length of time our back-to-back feats had taken, we had to stop the game early there after only 2 rounds unfortunately, so we called it a draw.


After Action Thoughts
Thagrosh2 is fun! He's similar to Lylyth in his "feat or bust" playstyle, but I think he's much more fun with his all his beasts and melee attacks. Looking towards the rest of the game, neither of us had any Control points, so I think it would have come down to assassination; on my next turn a Forsaken with 5 Fury had to kill 1 Pyg Burrower, and the I could charge with a 7 fury Thagrosh2 on a 0 fury Madrak2, with only 2 warrior models close enough for Grim Salvation. However if that had failed or he'd passed his Tough checks, I'd have died faster than you can say "no transfers available". Regarding my list, I think the 2 Scytheans would be better as 2 Angelius, as they can use the armour pierce attack to improve some match-ups, and with the Feat they can strike and retreat if needs be, helping me on scenario too, along with their fantastic "repulse" animus letting them escape very well!

Comparing this game with 40k, I think it really highlights the need for good play around orders of activation, and model placement. That extra Raek could have won me the game with better placement, but it's good to have something to work on. If you can get your placement and ordering correct, you can pull off more combos and more powerful ones, which are great ways to win such a fast-paced game.
From my first impressions, deployment is not as tactical, and terrain is less important (however that could be due to not having used too much). Deployment does seem like variations of "line up and run at each other" here, whereas in 40k there's much more to it than that. I think that mainly comes from the central nature of the objectives, the cumulative scoring rather than end-game and how quickly you can win a game, normally in 1-2 rounds of controlling objectives, all of which force players to get their armies into the middle of the board, and fast. Smaller boards and smaller forces, as well as the "control area" mechanic keeping things central also encourage straightforward deployment. I'm not saying this is bad, as this game is very tactically complex in other areas; I'm just comparing it to 40k, where placement can be almost perfect due to pre-measuring anything at any time, and order of activation is less important due to the "army moves, army shoots, army assaults" nature of the game.

I really enjoyed my first ever 50pts game, and I've got another one arranged for this Tuesday which I'll also be blogging. It's against Retribution of Scyrah if I remember correctly. Until then, thanks again for reading!

SimonW

Saturday, 8 November 2014

Warhammer Fantasy Battle Report: Wood Elves vs Skaven, 900pts

Hello again! This week I played Andy, a regular Warhammer Fantasy opponent, and his Skaven. We played twice, but I only got pictures the second time, and the first was over very quickly- he managed to turn my Sisters of the Thorn and Level 4 Wizard into Clanrats and Wither/Plague combo my Glade Guard in the same Magic Phase, so we called it there.
The game was for the Warhammer Escalation league running at our club, and this week we'd moved up to 900pts. Due to the new Warhammer FAQ, we also got 50% Lords & 50% Heroes, which meant it was time for a Level 4 Wizard!


Lists:
My list was slightly changed from the previous weeks:

Spellweaver, Level 4 (High Magic), Steed, Obsidian Lodestone, Dispel Scroll
Waystalker
15 Glade Guard, Trueflight Arrows, Musician
5 Sisters of the Thorn
5 Waywatchers
1 Great Eagle

I decided to try the Waystalker/Waywatcher combo instead of the poison scouts, and try to Hand of Glory them every turn so that I could still multi-shot effectively. The Level 4 with High Magic is something I want to use in bigger games, and I think the lore has lots of versatility, not to mention a really cool attribute- whenever you successfully cast a spell and it isn't dispelled, you gain a "protection counter" that negates the next unsaved wound. It sounds simple, but it's easy to start building them up and then your Wizard and accompanying unit become very durable!

Andy was using the following Skaven list:

Grey Seer, Warp Energy Condenser
Warlock Enginner, Doomrocket
40 Clanrats, Hand Weapon/Shield, Full Command
Poisoned Wind Mortar
6 Rat Ogres, 2 Packmasters and 1 Clan Moulder Packmaster
5 Giant Rats, 1 Packmaster
Warp Lightning Cannon
Lots of bodies! I thought I could avoid the Rat Ogres, and I'd have to kill the Cannon with the Eagle as soon as possible. The big brick was the main threat however, keeping his characters safe so 1 could hit me with the Doomrocket and the other transfigure me into Clanrats!

Magic
Spellweaver: Soul Quench, Hand of Glory, Tempest, Fiery Convocation
Sisters of the Thorn: Shield of Thorns, Curse of Anraheir
Grey Seer: Dreaded 13th, Warp Lightning, Skitterleap, Plague


 Deployment
We randomly generated the terrain again, and had a couple of "fancy" pieces- the hill on my left was an Anvil of Vaul, while just to my right of the river was a Bane Stone.
I was finished first, so got +1 to the roll for first turn and won it!


Wood Elves Turn 1
My Eagle makes a bee-line (or bird-line) for the Warp Lightning Cannon (behind the Giant Rats, it was a proxy), but makes sure he can't be charged. The Sisters advance towards the Clanrat block and try Fiery Convocation with all but 1 of my dice, but it is dispelled. I try Hand of Glory on the Waywatchers with my final dice, but I fail on a natural 2!. The Glade Guard and Waywatchers trim off a few Clanrats with shooting.

Skaven Turn 1
Andy movesthe Rat Ogres ready to occupy the building, and tries to block my Eagle with the Giant Rats. The Clanrats and Mortar advance, before Andy throws all of his dice into the Dreaded 13th on my Sisters. Luckily it isn't irresistible, so I use my Dispel Scroll. In the Shooting Phase, his Warp Lightning Cannon blows up 3 of the Waywatcher unit, while the Doomrocket lands smack in the middle of my Glade Guard, hits all 15 of them and kills 12. Ouch! They panic, and eventually flee off the table.


Wood Elves Turn 2
I need a big turn here, as Andy will surely win the attrition. I checked the rules for Flying models, and found that they are able to charge over intervening units, so the Great Eagle can get the Warp Lightning Cannon after all! Meanwhile my Sisters move to start clearing up the Giant Rats, but the Spellweaver splits off, hoping for a big Magic Phase. The Waywatchers don't move, hoping to get a Hand of Glory to help them out. In Magic, I roll reasonably, and throw 5 dice into Fiery Convocation which is cast irresistibly! After the dice are rolled, 22 of the 34 remaining Clanrats are dead, and the miscast caused me to suffer a wound use a protection counter, and drained a single dice. I had 1 dice left, and cast Hand of Glory, but Andy threw all 5 dispel dice at it and it was no more.
The Clanrats panicked after having so many ranks depleted however, which was a huge swing!
The waywatchers trimmed a couple more clanrats, sending them below 25% and killing the Warlock Engineer. However as Andy still had the Grey Seer they could rally normally.
In combat, the Eagle breaks the cannon and fails to catch it.


Skaven Turn 2
The Clanrats fail to rally! They keep running, but should have another chance or two. The Warp Lightning Cannon also continues to flee, while the Rat Ogres occupy the building. Andy's turn is pretty quiet overall- his magic is mostly out of range, and my Eagle passes its Toughness test from Plague. He does dispel Fiery Convocation though.


Wood Elves Turn 3
I try to push for the win- my Eagle chases the Warp Lightning Cannon off the table, while my Wizard aims at both Clanrats and Rat Ogres. I cast a boosted Soul Quench on the Clanrats, reducing them to 5 plus the Grey Seer- however I didn't realise that fleeing units don't take panic tests, else I'd probably have targeted the Rat Ogres.
I don't have much shooting left, and it doesn't achieve much this turn/

Skaven Turn 3
The Clanrats again fail to rally and are millimetres from the, so Andy leaves the building with his Rat Ogres, and Skitterleaps his Grey Seer inside before the unit runs off the table next turn. Clever play! He tries to cast some spells to thin me out but unfortunately the Winds of Magic aren't with him and he can't do much.

Wood Elves Turn 4
My Spellweaver pushed a boosted Soul Quench through irresistibly on the Grey Seer and loses another wound protection counter in the fallout. However the Grey Seer fares considerably worse, even with his 4+ Ward Save, and he is dead. The Giant Rats flee from the Sisters' Javelins, while the Waywatchers avoid the arc of the Rat Ogres.
At this point we call the game, as Andy has only 1 Rat Ogre unit left and it's quite easy for me to avoid them for the rest of the game.

After Action Thoughts
Magic is brutal! After the first game where he destroyed me with it in one round, almost the same happened in reverse this time. It turned out to be "who can cast the big spell 1st", and luckily it was me this time. However I'm sure as the points increase and we have bigger armies around the wizards, the balance will change as there's only so many power dice and they can only have so much influence. This game was fun, and we're both continuing to learn the rules- Flying units being able to charge over intervening units was a big deal this game, and I felt bad for Andy because he had no idea it was the case. I only found out that turn when I checked the rules to see how it worked! It's really interesting coming in from knowing very little about a game, and certainly different to 40k.


Thanks for reading, and thanks again to Andy for the great match. I'm already looking forward to next week's games, and I'm hoping to play both Fantasy and Warmahordes, or even 2 games of Fantasy, and I'll be sure to post the reports up here.

SimonW

Friday, 24 October 2014

Returning to Fantasy

Hello! Today I'll be writing about starting Warhammer Fantasy, with Wood Elves, and I'll include a few battle reports from the start of our Escalation league.

Firstly, my apologies for the long delay since the previous post. I've recently started a new job, and have been working long hours so just haven't had much time to blog. However it's settled down now, so I've got more free time for hobby-related activities!

The Plan

So, why Warhammer Fantasy? I used to play back in 5th edition with a Skaven army, but I got bored fairly quickly and didn't enjoy the painting at all. So I sold the lot and focused on 40k. However recently a couple of players at my local club have started playing Fantasy, and it looked great fun. Add to that one of them had a load of Wood Elves for sale- an army whose aesthetic and playstyle has always appealed to me- and I was in. I prefer manoeuvrable, shooty armies to combat oriented ones (like my 40k Eldar), so the Wood Elves seemed a perfect fit. They also just got a new book released along with a couple of new kits, which made it seem like the perfect time.

From my initial games Wood Elves seemed pretty good, and after chatting with some more experienced players they agreed that the new book was considered quite strong. I had mixed feelings about this- on the one hand, it's good to know that an army you're going to spend money on is good and won't be frustrating to play as it frequently fights uphill, but on the other hand I was quite looking forward to more casual games of Fantasy and it was a shame that I was already playing a very strong faction. Luckily, many of the other guys who play have either High Elves, Warriors of Chaos or Undead Legion, all of which I'm assured are very strong too!

The League

Our Escalation league starts at 600pts, with a 300pt increase every 3 weeks to 1200pts maximum. All painted models get Hatred (Unpainted Models), which I think is a great idea. List changes are allowed as much as you like, but I decided to keep the same so I could get used to it.

My list was the following:

Spellsinger (Lore of Shadow)
Level 2
Dispel Scroll
Elven Steed
150

10 Glade Guard
Trueflight Arrows
Musician
160

5 Sisters of the Thorn
130

5 Deepwood Scouts
Hagbane Arrows
80

5 Deepwood Scouts
Hagbane Arrows
80

This comes to 600pts on the nose. The plan was to not have much to deploy, and hopefully get first turn with the +1 bonus for finishing first. The Glade Guard should sit behind my free wood, while the Scouts and Sisters harass as best they can. I made sure to bring plenty of magic, as I wanted to learn the mechanics behind it, and experiment with different spells!

The Games

This was the second week of our league, and I was able to get some photos for battle reports this time- previously I was pretty busy learning the mechanics, but now I'm more confident with them I had time to take photos. In every game, the large snow based wood was the "free" Wood Elves one. I always put it just inside my table half, in the centre of the board.

Game 1- Jay's High Elves

Jay brought more or less the following:

Mage
Level 2 (High Magic)
Mounted

5 Ellyrian Reavers

5 Sisters of Averlorn

5 Dragon Princes

5 Shadow Warriors

Jay went for both the High Magic signature spells on his Mage, Drain Magic and Soul Quench, while I got Melkoth's Mystifying Miasma and Okkam's Mindrazor on the Spellsinger.


Deployment and Wood Elves Turn 1
Deployment and Game Turn 1
The Trueflight Glade Guard line up behind the free wood and get ready to shoot through. The Sisters of the Thorn deploy on the left with the Spellweaver and use their Vanguard move to get up the middle. I put a unit of Scouts in each wood.
Jay deployed his Dragon Princes on the flank and his Reavers centrally, with the Sisters of Averlorn. His Shadow Warriors scouted on my right.
I won the roll off thanks to the +1 bonus and went first. The Trueflight Glade Guard wheeled and shot at the Shadow Warriors, reducing them to a single elf. My Sisters of the Thorn got behind Jay's Sisters of Averlorn. Their magic did little except cast Shield of Thorns on the middle Scouts and Miasma on the Reavers. However the javelins combined with 1 unit of Scouts and killed all but 1 Sister of Averlorn. Finally the other Scout unit killed 2 Reavers. Jay passed all his panic tests.


High Elves Turn 1, Wood Elves Turn 2Jay advances his Dragon Princes, and desperately charges his last shadow warrior into my Glade Guard. Unfortunately the 10 Trueflight arrows cut him down, ignoring all penalties.
In the magic phase, Jay removes Miasma and then casts Soul Quench on the central Scouts. However he miscasts and rolls a Dimensional Cascade, and he fails the 4+ and his mage is destroyed! He does kill 3 of the Scouts with the spell though, who flee. His Reavers also kill 2 Glade Guard.
In my turn I rally the scouts, who do nothing more. I wheel the Glade Guard and clip the Venom Thicket with them, before they shoot into the Reavers again, but this time for no damage. The left hand Scouts finish the last Sister of Averlorn, and the Sisters of the Thorn throw javelins at the Dragon Princes to no effect. Magic this turn has little effect except reducing the Reavers to BS3 with Miasma.


 High Elves Turn 2, Wood Elves Turn 3
Jay's Reavers try to shoot some Scouts, but they need 6s to hit and do nothing. His Dragon Princes line up a charge on the Glade Guard for next turn.
In my turn, the Glade Guard swiftly reform and walk backwards into the trees, aiming at the Dragon Princes along with the rallied Scouts. Between the magic arrows and Jay's terrible saves they manage to kill 4 out of 5, and the 5th Prince flees!
My other Scouts and Sisters kill off another 2 reavers.


High Elves Turn 3, Wood Elves Turn 4
Jay's Dragon Prince fails to rally and is almost off the board, while his final Reaver tries and fails to shoot a Sister of the Thorn. Miasma has been really good this game, neutering a lot of Jay's shooting.
In my final turn, I shoot down the Dragon Prince and charge the final Reaver; the Sisters get the job done and the game is over.


After Action Thoughts
That was fun! The list plays how I hoped- fast, manoeuvrable, and hard hitting. I think in small points games, the arc-dodging of the Wood Elves is very strong, so it remains to be seen how that will pan out as the points increase. I felt bad for Jay, as to lose a wizard to a miscast on only 3 dice, on the first turn, is such a shame, and from then I could dominate the magic phase.
Jay was a great opponent as always, and we've got a rematch arranged for as soon as possible!


Game 2- Andy's Brettonians
Andy is organising the Escalation league and has played lots of Warhammer Fantasy, and he was really helpful with the rules. He had the following list:

Battle Standard Hero
Mounted

Priestess
Level 1 (Beasts)

Cheap Lord
Mounted

8 Knights Errant
Lances/Shields/Command Group

10 Peasant Bowmen
Spikes

10 Peasant Bowmen
Spikes


For magic, Andy gets Curse of Anraheir on the Priestess, while I get Melkoth's Mystifying Miasma and Purple Sun.


Deployment and Game Turn 1
My set up was similar to before, but the scouts stuck together opposite the big unit of Knights. Andy won the roll off and went first, plowing towards my lines. His longbowmen moved up and killed 1 Glade Guard and 2 Scouts.
In my turn, I get quite a low Winds of Magic roll so cast Curse of Anraheir on the Knights and move around them with the Sisters. One unit of scouts discovered a Fungus Forest and wandered forward in a daze. My shooting wasn't very effective, killing just 1 knight.


Game Turn 2
 The Knights charge the Scouts and kill them all, but not before 4 of them die and the BSB, Wizard and Lord all take wounds through a combination of dangerous terrain, and my rerolls to hit and also rerolling wound rolls of 1. The other scout unit panics at the sight and flees from the board. The Longbowmen try to shoot at my sisters, but only kill 1.
My Glade Guard panic one unit of Longbowmen off the board, while the Sisters fail to Javelin anything. Curse of Anraheir is maintained on the Knights.


Game Turn 3
 The Knights break apart to make a hail mary move, the 2 Errants marching towards the Sisters while the characters surround my Glade Guard. The peasants swift reform and kill 2 Sisters, who then fail panic! It's not quite off the board, but I'm getting charged next turn.
Luckily I rally and get a strong magic roll, so I can cast a boosted Miasma on the Peasants, Anraheir on the Knights, and Shield of Thorns on the Glade Guard. The Glade Guard then shoot down the Battle Standard Bearer in a hail of Armour Piercing arrows.


Game Turn 4 Onwards
Andy charges the Glade Guard with his Lord, and passes Dangerous Terrain, then 2 saves from Shield of Thorns, then 3 more from my poisoned rerolling attacks. He kills 3 Glade Guard and runs down the rest, again passing Dangerous Terrain.  Andy also casts Anraheir on my Sisters and fails to dispel Shield of Thorns, which promptly kills the 2 Knights! The peasants have already marched though, so luckily can't shoot me.
Turn 5, Andy's Lord tries to leave the woods and trips over a tree, losing his last wound. His peasants shoot at my 2 remaining Sisters and Spellsinger, but only kill 1 and they pass panic. We thought this was turn 6, and so as I was winning on points I didn't move due to fear of Dangerous Terrain, and so that was another narrow win for the Wood Elves!


After Action Thoughts
What a close game, with some real swings at the end! It's a shame we only played 5 turns, as it would have been interesting to see what would have happened next, although I'd likely have braved the dangerous terrain tests and hidden in the corner of the board. That was a great game- I didn't manoeuvre quite so well this time, and I think I should have focussed on clearing the peasants first and then running around the Knight block all game and keeping Curse of Anraheir on them to attrition them down through Dangerous Terrain tests.


Finally, I played Andy's Dwarves straight after this game, as we still had plenty of time.

Game 3- Andy's Dwarves
Andy has several Fantasy armies, and brought 600pts of a few to help the Escalation get running. This time it was his Dwarves, with a gunline:

Thane

10 Thunderers

10 Thunderers

Organ Gun
+1 BS
Reroll misfire

For magic I got The Withering, and took Miasma as well.

 Deployment and Dwarves' Turn 1
Andy sets up in a line, as do I, out of range of the Organ gun with most things but in range to move and poison it. However he goes first and in a hail of bullets tears apart 6 Glade Guard! Fortunately they pass their panic test.

Game Turn 2 
In the Wood Elves' first turn, I move up, Anraheir the Organ Gun and Miasma one unit of Thunderers. Then my poison scouts try their best to kill the Organ Gun and only do 1 wound. However, my Trueflight arrows do 4 hits and 2 wounds, finishing it off!
Andy responds by marching both units straight forward, and then in my 2nd turn I Wither one unit and kill 3 with shooting. The other unit gets Miasma to reduce their BS.


Game Turn 3
Andy shoots at the Sisters, with both units, but they have soft cover and Miasma to protect them, and only 1 dies. In my turn I again get a good Wither into the weak unit, and their toughness 1 exposes them to my bows, killing another 5. The other unit is again Miasma'd, protecting me from retribution.


 Game Turn 4
Andy turns to face my Sisters and shoots them, but needs 9s to hit and does nothing. The Spellsinger again casts Withering, this time only reducing the Dwarves' Toughness by 1 and the following shooting phase is much less effective.

End of Game
So on my turn 5 I charged into combat to see what would happen... and it did not go well. I'm sure given time Andy's T6 Thane would have ground me down and broken or killed everything, But luckily the game finished while I still had enough points left for the win, although he was able to kill 4 Scouts, 2 Sisters and my Spellsinger!


After Action Thoughts

Another close game with Andy! I probably should have just shot his Thane and friends at the end of the game, but in the spirit of the league I tried to win via melee. Rerolls from Always Strike First are nice, but they only go so far against T6 and a 2+ save! The Organ Gun was brutal, but after it died so quickly I was able to mow down most of Andy's army as it crossed the board. The Withering was an amazing spell too- reducing his higher Toughness by 2-3 almost every turn was invaluable.


That's the end of this week's battle reports! I had a ton of fun, and it was great to play something different. Hopefully I'll have a couple of Warmahordes games in the next few weeks, so watch out for those battle reports as well. I've played a few practice games and I'm feeling more confident about the mechanics, if not the precise detail of the rules.

I hope you enjoyed the games even half as much as I did, and as always thanks for reading!

SimonW

Saturday, 20 September 2014

Warhammer 40k Battle Report: Eldar vs Astra Militarum, 1650

After this week's X-Wing games, I had another GT practice match as well, against Andy and his Astra Militarum artillery army. We played Big Guns Never Tire/Tactical Escalation, with Hammer and Anvil deployment. I was looking forward to seeing how the Wave Serpents performed against the firepower of the Astra Militarum, particularly against the Vendettas and artillery.


Lists
My list was the same as usual.

Andy's list was approximately the following:

Company Command Squad, Banner, Medic, Officer of the Fleet

Platoon Command, 4 Melta Guns (in a Vendetta)
20 man Infantry Squad, Ministorum Priest
Sabre Defence Platform, Lascannons

Platoon Command, 4 Melta Guns (in a Vendetta)
20 man Infantry Squad, Ministorum Priest
Sabre Defence Platform, Lascannons

Vendetta

Vendetta

3 Thudd Guns

3 Thudd Guns

3 Medusa Gun Carriage Heavy Artillery Platforms with Bastion Breacher Shells (Imperial Armour 1: Imperial Guard, 2nd Edition P. 188)

Skyshield

Deployment

 I won the roll and had to deploy first. I lined my long board edge symmetrically, with 1 Wave Serpent at each end, the 2 Night Spinners inside them and the last 3 Serpents in the middle, with the Fire Dragons in the exact centre. My Wraithknight Warlord is at the front, hoping to punch out the artillery as soon as possible.

Andy places his Skyshield centrally and all the artillery on top, with the Company Command in the middle to help with orders and banner rerolls for Morale and Pinning.
One blob starts centrally and one on the left, so that my Wraithknight has no clear path to the artillery.
The 2 Sabre platforms deploy in the towers either side of his Skyshield.

I choose to take 1st turn, and Andy fails to Seize the Initiative.


The Game


Eldar Turn 1
I move everything into range and try to take out as much of the artillery as possible turn 1.
The Night Spinners team up and manage to snipe out Andy's Company Commander for Slay the Warlord and to neutralise his orders. Good work! The Wave Serpents start shooting at the artillery, but it doesn't go well- T7 and 3+ armour makes these things resilient. After the dust settles I've killed the one Sabre Platform on my right for First Strike and 1 of the Medusa platforms. Those platforms are extra durable with 4 wounds each! As it's Tactical Escalation I only have 1 TacO this round, one of the bridge objectives, which I don't reach this turn.


Astra Militarum Turn 1
Andy moves the blobs up to slow down the Wraithknight, and the artillery prepares to fire.
The Medusas take aim at the Fire Dragon Serpent containing my Warlord. It jinks, but to no avail, as the Str 10 Ordnance does its thing and blows it up! First Strike for Andy. The Thudds scatter wildly (fortunately for me) and that's the end of the phase. Andy gets the middle bridge objective as a Taco and is just out of range, even after running.

Turn 1 Mission Summary:
We both have First Strike, I have Slay the Warlord, and neither of us have any TacOs.


Eldar Turn 2
I decide that shooting the artillery is not going to work, so I need to blow away Andy's fearless tarpits to allow my Wraithknight to move up and kill the batteries in melee. My Swooping Hawks would have been very useful here, so they naturally decide to stay in reserve (despite only needing a 2+). One Night Spinner tries to snipe a Priest on my right but scatters completely away. The other shoots at the 2 Thudd batteries and is more successful, managing to pin one of them. All my Dire Avengers get out to shoot into the blobs, and the Fire Dragons get into a newly empty Serpent. After shooting is over, the central blob has just 2 guys left and the far side has about 6. The Wraithknight assaults the larger one and kills 4, leaving the fearless Priest and a single friend.


Astra Militarum Turn 2

Andy's Vendettas both arrive with the Officer of the Fleet bonus, and each shoots a Wave Serpent, forcing 2 to Jink. The Medusas aim at the red Serpent which Jinks but is still shaken, and they also clip the blue Night Spinner, denying it a Jink save and it becomes immobilised. 2 Guardsmen slip past the Wraithknight to score a TacO, and then in melee the Wraithknight easily crushes the Priest and final guardsmen, consolidating towards the Skyshield.

Turn 2 Mission Summary
Andy achieved 1 TacO this round, for a 1-0 lead in the secondary.


Unfortunately my phone's battery became too low for the camera at this point, so I have to continue the report without any pictures.

Eldar Turn 3
My 4 wave Serpents advance slightly and pair off, 2 shooting each Vendetta. Between them they manage a single hull point on one, which is not what I would have liked. The Night Spinners eliminate the Company Command Squad and it's banner, denying the artillery pieces re-rolls to Morale in the assault that's going to follow.
My Swooping Hawks arrive next to the remaining Sabre, ready to jump up and melee it to death next turn. The Wraithknight assaults the Medusa unit and after causing 3 wounds they fall back and he sweeps them all.

Astra Militarum Turn 3
Andy's planes each turn and cross each other. The melta Platoon Command Squads both deep strike out and use the Run then Shoot Order to get in close range of a Serpent each. Between the 4 squads he makes all 4 of my remaining Serpents Jink, but it's not enough for one of them and it explodes. The other 3 have taken a variety of hull points throughout the game, through glancing hits or crew shaken results after Jinking. The Thudds annihilate 2 squads of Dire Avengers.

Turn 3 Mission Summary
While I achieve 2 TacOs this round, Andy does too, and his are each worth 2pts! He takes a 5-2 lead in the Secondary. However I've killed a Heavy Support choice so I'm winning the primary 1-0 (not counting objectives).


Eldar Turn 4
I'm losing firepower pretty quickly so need to do something about it this turn. I form a plan to clear out a substantial amount of Andy's army this turn- my Wraithknight will destroy a Thudd Battery in assault, the Hawks will jump up and kill the Sabre Platform in melee, my Night Spinners, Dire Avengers and Fire Dragons will shoot both melta PCS while my Serpents will try to kill Vendettas. I also need to score some TacOs, and have enough cards now that I'm able to score a 2 for 3pts. However I need to kill 3 units this turn and control an Objective.
In the ensuing shooting phase my infantry/Night Spinners do their job and clean out both of Andy's PCS. The Hawks and Wraithknight forgo shooting to get ready for melee, while my Serpents look to the skies. Each Vendetta takes another hull point, and 1 is Shaken as well.
In the Assault phase, the Wraithknight does his thing to the first Thudd battery and sweeps it, while the Hawks beat up the crew for the Sabre, neutralising that as well.

Astra Militarum Turn 4
Things aren't so good for Andy now- that was a really clutch turn for me and has possibly sealed the game. His final Thudd battery tries to kill my Fire Dragons and Autarch for pride but can't quite manage it- the Autarch drops to 1 wound and 1 Fire Dragon is left alive after some careful Look Out Sirs! His Shaken Vendetta flies off the board, ready to come back on turn 5. The other one zooms over to a damaged Wave Serpent and annihilates it in a hail of Lascannon fire.

Turn 4 Mission Summary
I draw level on the TacOs this round, as Andy doesn't score any and I get 3pts, leaving the scores at 5-5. I also got another point for Big Guns, extending my lead to 2-0.

Eldar Turn 5
I think I'm in a position to win now, so go for the throat. I position units on 4 out of 5 Big Guns Objectives to get a strong margin of victory should the game end, the Wraithknight hops on to a Skyfire Nexus by the Skyshield to try and shoot the Vendetta off the table, and both Wave Serpents take take aim as well. Despite the Wraithknight missing twice, the Wave Serpent is finally successful and Wrecks the Vendetta. The Hawks jump over and sweep the Thudd Battery, despite losing 3 of their number to Overwatch fire from Lasguns!

Astra Militarum Turn 5Andy's Vendetta flies on his left side, and tries to nail a Wave Serpent to rack up some more points destroyed. Unfortunately for him I pass my Jink saves,

Turn 5 Mission Summary
I was able to achieve 2 more TacOs in my turn (control a marker and kill a flyer), so now I have a 7-5 lead that Andy will almost certainly not be able to assail. I've also got 15pts for Big Guns- 4 Objectives and 3 Heavy Support, while Andy doesn't have any.

We roll for the game... and it continues...

Eldar Turn 6
 My Night Spinners spread out so that I now control all 5 Big Guns objectives, and another TacO. My Wraithknight stays on his Skyfire Nexus and draws a bead to the last Vendetta, but misses twice again! However my final 2 Wave Serpents have a taste for planes now and Andy's final unit is Wrecked.

Game over!

End Game Mission Summary
I control all the Big Guns Objectives and destroyed 3 Heavy Support choices for an 18-0 win in the Primary, netting 10 Tournament Points. I also win the Secondary with an 8-5 in TacOs for another 6 TPs, and take the Tertiaries (First Strike/Warlord/Line Breaker) 2-1 for 4 TPs. Final Score is 20-0 to the Eldar!

After Action Thoughts

Wow, that was tough! I thought that I probably had the board control and manoeuvrability to win the Primary mission, but Andy really made me work hard for it. After Andy's Turn 3 I thought he had a real chance to win the Secondary (as long as I couldn't table him), but luckily I was able to score points when I needed to and never fell too far behind. The GT rules pack prevents you scoring more than 2 TacOs per turn, and I think without that limit Andy could really have pulled ahead, but alas.

I was happy with the list again, and was glad to really be able to test the firepower. I was happy that I could clear out almost all 40 guardsmen in 1 round even without the Hawks, and the Night Spinners once again performed well by clearing key models and causing Pinning checks. I think Andy was slightly too aggressive with the blobs- had they hung back ready to tarpit my Wraithknight they'd have had much more of an impact and kept his artillery alive, but the central Objectives made that difficult.

I also want to talk about those Medusa Artillery Platforms some more- they were amazing! Toughness 7, 4 Wounds, 3+ armour and 4+ Invun from the Skyshield, with a Large Blast Str 10 AP2 Ordnance Barrage is a truly sick profile! Bastion Breachers are a cheap upgrade too, trading the large blast for a small one but gaining Str 10 AP1 Armourbane instead. They are just over 100pts per gun, but 1 battery is worth it in my opinion. I was lucky Andy only got 2 shooting phases with them, and that he got a bad scatter turn 2 that stopped them killing a 2nd Serpent. I think with orders, or a Divination psyker for Prescience (and maybe Ignores Cover), they'd be obscene!
The Thudds were devastating too, but I think 2 batteries of 3 is overkill- 16 blasts from 2 lots of 2 guns should be enough, especially if you can use the leftover points for better psychic support.

So, there's just under a week to go until the GT and I'm feeling excited! Those 2 games of X-Wing really helped with my 40k burnout, and this game improved my strategy against artillery, gunlines and cake stands Skyshields.

I'd like to wrap up by saying thanks to Andy for a great game! It was much closer than the scoreline indicates, but that's often the way with tournament points unfortunately.

This week I plan on finishing the last few bits of my army, so hopefully I'll get some pictures up soon. Thanks once again for reading, and as always any comments or thoughts are appreciated below!

SimonW

Wednesday, 3 September 2014

Warhammer 40k Battle Report: Eldar vs White Scars, 1650

Welcome to my inaugural battle report on Back In The Box!

This game was 1650 points, as a practice match for the first UK 40k GT heat, held in Cardiff at the end of September. We played mission 4 (mission pack here)- the primary mission was Eternal War: The Relic, the secondary mission was Maelstrom of War: Spoils of War, and the tertiary mission was to achieve as many of First Strike (kill a unit in your own first turn, achievable by both players), Slay the Warlord and Linebreaker as possible. The primary mission is worth 10 tournament points to the winner, the secondary is worth 6 TPs, and the tertiary is worth 4 TPs to whoever achieves the most out of the three objectives. If you draw any of the missions, you each score half the points.

I'd also like to apologise for failing to live-tweet the game via my blog's twitter account. I thought it would be a good idea, but the mysterious Dark Gods of mobile internet decided that it was not to be and I wasn't able to post anything from my gaming club. I'll try again in future, but this could be a recurring problem.

I used a list I've been working on for a while, that I plan to use at the heat- essentially it's a "serpent spam" army, but with some variation in the supporting elements. I'll do another post discussing the list in more detail soon.
Primary Detachment: Combined Arms Detachment
Faction: Iyanden Eldar

HQ:
Autarch, Scorpion Chainsword

Troops:
5 Dire Avengers, Wave Serpent, Twin-Linked Scatter Lasers, Shuriken Cannon Upgrade

Elites:
5 Fire Dragons, Wave Serpent, Twin-Linked Scatter Lasers

Fast Attack:
6 Swooping Hawks

Heavy Support:
Wraithknight (Warlord)
Night Spinner
Night Spinner

Drew, my opponent, has a beautiful White Scar bike army. I asked him to bring the "classic" tournament style army, specifically including the so-called Bikestar command squad. He obliged, and then some!

Primary Detachment: Combined Arms Detachment
Faction: Space Marines (White Scars Chapter Tactics)

HQ:
Chapter Master,Thunder Hammer, Shield Eternal, Artificer Armour, Bike, Auspex
Khan, Moondrakken (Warlord)
Command Squad, Bikes, Apothecary, 4x Grav Gun

Troops:
5 Bikes, 2x Grav Gun, Combi-Grav
5 Bikes, 2x Meltagun, Combi-Melta

Fast Attack:
Stormtalon Gunship, Skyhammer Missiles

Heavy Support:
Thunderfire Cannon
Thunderfire Cannon

Ouch! That's a solid alpha strike army, well supported with the Thunderfire Cannons (TFCs) and Stormtalons. If I went second, I felt like this could really sting.

We rolled warlord traits- I chose strategic for the Wraithknight, and with the re-roll for a Combined Arms Detachment managed to get Master Of Ambush (Warlord +3 non-vehicle units get Infiltrate)! This is one of my favourite traits, as it allows me to counter deploy the Wraithknight and 3 of my Wave Serpents (although it specifies non-vehicle units, if a unit with Infiltrate deploys inside a dedicated transport, they may Infiltrate along with their transport, BRB page 167). Here I chose the orange Fire Dragon Serpent, and the red and pink Dire Avenger Serpents, to Infiltrate, along with the Wraithknight. Drew had to settle for Khan's Champion of Humanity trait to get his crucial scout moves.

I won the roll to select sides and deploy first, and split my forces reasonably evenly between the 2 corners of my zone. Drew set up in a fairly broad line- TFCs at each end, Bikestar in the middle and 2 troop squads either side of it. After Infiltrate and scout moves, the board looked like this:


The Wraithknight is hiding away from grav guns in the bottom right corner, along with a yellow Dire Avenger Wave Serpent (also with the Autarch) and purple Night Spinner. The red, green and pink Dire Avenger Serpents are in the bottom left, along with the orange Fire Dragon one and the blue Night Spinner. The Bikestar is the bike unit in the middle ruins. The TFCs are in the buidlings at either end, both of which are reinforced, and the grav bikers are the squads at either end. The first melta squad is next to the relic marker, and the second is behind the Bikestar. 

I took first turn to try and get as many bikers down as I could, then Drew rolled to seize... and did!

White Scars Turn 1
Drew moves one bike squad onto the relic, turbo boosts the far right squad across his board edge, and advances everything else towards my vehicle cluster.
Drew's shooting begins with his Orbital Strike, using the Targeting Relay objective to re-roll the scatter dice and catch 4 of my vehicles! My Wave Serpents weathered the storm pretty well, with poor rolling and serpent shields protecting against any real damage. However the Night Spinner fared less well and suffered a penetrating hit followed by an Explodes result! First Strike for Drew! The Bikestar couldn't see the primary target (green Falcon Serpent) though, so that wasn't so bad. The grav bikers in range shot at the red Wave Serpent which declined to Jink- I reasoned that even immobilised I'd still have plenty of firepower and I didn't think he'd get 2 grav results. As it happened, the bikers fluffed their shooting even with the combi-grav, and did no damage. The melta bikers shot at the orange Wave Serpent containing the fire dragons- again I didn't Jink, and again I suffered no damage. The Thunderfires tried to chip some hull points from my tank cluster, but to no avail. Finally he turbo boosts the squad carrying the relic back 6".
Drew achieves a Tactical Objective (TacO) too, securing objective 3.


The Blue Night Spinner has died, and Bikestar is strung out to make use of a Targeting Relay mysterious objective. A melta bike squad has the relic and is trying to hide behind the bunker, while a grav squad turbo boosts across to get into the fight next turn.

Eldar Turn 1
That went... surprisingly well! Not nearly as bad as I'd thought. I still had most of my firepower and could bring almost all of it to bear.
On my left flank, the red Wave Serpent moved up 6 and dropped off the Dire Avengers. The green Wave Serpent (that looks like a falcon...) did the same, as did the orange Serpent with the Fire Dragons. The pink Serpent decided to keep its cargo for now, as they didn't have too much to do, but it also moved 6 to be able to fire all 3 weapons at full BS. Over on the right side, the Wraithknight advanced to just shy of 30" away from the grav melta bikes holding the Relic, thinking they were grav guns instead. The yellow Wave Serpent advanced a full 12" to get the scatter lasers in range of the command squad, and the remaining Night Spinner followed behind.
The shooting phase starts with the Night Spinner trying to barrage-snipe the biker holding the relic, but to no avail. Then the left flank opened fire. The red Dire Avengers shot at the grav bikers near the board edge, doing no damage. Then the fire dragons battle-focused towards them and forced Drew to Jink with his squad. The dragons only killed 1 biker, but crucially forced the grav guns to snap fire next turn, so I was happy. The bottom squad of Avengers battle focused to shoot at the melta bikers, killing 1. Then the wave serpents opened fire. The pink Serpent also shot at the melta bikers, killing off 3 more so that only 1 remained. The red, orange, and green Serpents all shot at the command squad. (NB- the GT we're attending ruled the serpent shield as a hull mounted weapon with a 45 degree total firing arc. However, you're allowed to choose the point of the hull on which you draw the arc from, meaning I was able to keep the tanking chapter master out of arc for the shield on the red Serpent). The yellow Serpent was also able to shoot into the squishy back of the squad, along with the Wraithknight (who forced them to Jink). After the dust settled, the chapter master was down to 1 wound, and just Khan and the Apothecary had survived out of the rest of the squad!
I was reasonably happy with my first turn. however as I failed to kill an entire unit, I didn't manage First Strike. Also worth noting is that Drew had "Secure Objective 4" as a TacO, and due to the Seize the Loot special rule, I was able to steal it from him.

The Bikestar is out of coherency in the middle. It is heavily damaged and the Chapter Master has taken 3 wounds. Next to it is a single combi-melta sergeant, who has also Jinked. The far left bike squad has grav guns, and has also Jinked.

Turn 1 summary-
Primary Mission: 5-0 White Scars
Secondary Mission: 1-1
Tertiary Mission: 1-0 White Scars

White Scars Turn 2
Drew's firepower was quite reduced here, having jinked multiple squads. However he still has the relic, which he continues to drag and turbo boost towards the corner. Both the Stormtalons arrive this turn, ensuring he still has considerable firepower. He positions them well, ensuring they both have shots on multiple targets. The command squad position to launch a multiple assault on the Dire Avengers and green Serpent, needing more than 5" but less than 9" to get the assault to work properly. The jinking grav bikers on the left decide to hide in combat with the Dire Avengers, while the squad near the board edge moves up to shoot the Fire Dragons.
Drew starts by shooting the TFCs, reducing the orange Serpent to a single hull and chipping another from the pink one. The 1st stormtalon shoots the red Serpent, stripping a hull point and forcing snap shots. The lone biker attempts to combi melta the orange serpent, but misses. The 2nd stormtalon then kills the wounded orange Serpent, denying the lone biker an assault. The far left grav squad forgo shooting, while the middle squad annihilates 4 of the fire dragons.
In the ensuing assault phase, Drew kills 3 Dire Avengers on the left who then pass their Ld 6 morale test, letting Drew hide in melee for a turn. The command squad however roll double 6 on the assault, and with the 7th Edition multi-assault rules they all had to engage Dire Avengers! Naturally the Avengers were butchered, but now the damaged Bikestar is out in the open and vulnerable...
Drew didn't manage to achieve any TacOs this turn- they were quite difficult ones, so he rightly focused on killing more stuff.

The Stormtalons arrive and Drew wrecks the orange Wave Serpent with one, the other forcing my red Serpent to Jink. The squad with the relic near the middle of his board edge continue to move away from me. The Bikestar, near the green Serpent, rolls too high to launch its multi-assault and is forced to solely engage the Dire Avengers.

Eldar Turn 2
I decide that the red Serpent, being forced to make snap shots anyway, will shoot a Stormtalon. My swooping hawks arrive and decide to try and drop the biker holding the relic, slowing Drew down, but one of them dies to dangerous terrain on landing and the resulting small blast does no damage. The Night Spinner plans to try and snipe the relic carrier, while the yellow Serpent aims at the fresh grav bikers. The green and pink Serpents both aim at the Bikestar, while the pink Avengers debark and aim at the fresh grav bikers too. Finally the Wraithknight advances towards the melta-wielding relic squad, hoping to pick up the relic as soon as he can.
The shooting phase rolls around again, and the 2 wave serpents make quick work of the damaged Bikestar for Slay the Warlord. The Night Spinner manages to barrage snipe the relic holder successfully, then the hawks try to put some more damage into the squad. They do 5 wounds on 15 shots (despite needing 6s) and then Drew fails 4 saves, wiping them out! Swooping Hawk power! The yellow Serpent combines with the pink Avengers to force a morale check on the grav bikers, who then fail and flee 13" off the board by a hair's width! This turn is going very well for me so far. To top it off, the red Serpent destroys the first Stormtalon with a 7-shot Serpent Shield Spike (try saying that after a few drinks) and the Wraithknight discovers he is claiming a Skyfire Nexus and strips a hull point from the other Stormtalon.
Finally in the assault phase, the Dire Avengers and bikers both derp at each other, doing no damage and then Drew fails his Hit and Run check. The lone Fire Dragon also tries to assault the lonely biker after failing to fusion him, but this turns into a bad idea when neither of us wound and Drew Hits and Runs 13" behind the green Serpent. Oops...
On the TacO front, I am able to score Supremacy (hold 2+ markers and twice as many as your opponent) for 2pts and Assassinate (kill a character) for 1pt.

The Swooping Hawks combine with the Night Spinner to kill all 5 of the relic carrying squad! Pew pew! My Wraithknight advances towards the middle, and the Bikestar is destroyed. The Fire dragon is left on his own after the lone biker near my board edge Hit and Runs behind a Serpent.

Turn 2 summary-
Primary Mission: 0-0
Secondary Mission: 4-1 Eldar
Tertiary Mission: 1-1

White Scars Turn 3
Things aren't looking good for Drew- he has a bike squad locked in combat, a single bike sergeant with meltabomb, and a snap firing stormtalon. He does have the two TFCs as well, so can continue to chip away at my vehicles.
He does so in the shooting phase, the pink Serpent dropping to a single hull point from the first TFC, and with some clever blast placement Drew also nails 4 Dire Avengers with it, and the survivor is pinned. Meanwhile the snap-firing stormtalon simply forces my red Serpent to Jink- as it is shooting at a plane next turn, Jinking has no downside. One TFC scatters wildly onto the swooping hawks and kills 2,
In the assault phase his meltabomb sergeant immobilises the green Serpent while the bikes and Avengers once again stay locked in melee.
He doesn't manage any more TacOs, using his remaining units to inflict damage instead.

The remaining Stormtalon is just in the bottom left corner. Drew failed to Hit and Run with the bikers engaged in melee on the far left. The TFCs continue shelling tanks, and one scatters into the pink Dire Avengers, killing 4!

Eldar Turn 3
The hawks jump to the sky, ready to grab the relic. The Wraithknight moves towards the TFC in the far right corner, hoping to limit any return fire. The serpents line up shots where they can, the red one aiming at the remaining stormtalon so that he doesn't suffer too badly from being forced to snap fire. My shooting is quite quiet this turn- the TFC on the left passes the few saves I manage to inflict. The last fire dragon aims at the last biker again, but Drew's 3+ Jink save ensures he survives. I then battle focus onto the objective, hoping to control it for more Secondary points. Of note is the red Serpent, who wrecks the Stormtalon, which then crashed onto the bikes/Dire Avenger Combat, killing a biker! Just as planned...
In the assault phase, the sergeant auto-hits the green Serpent with a meltabomb, and in the ensuing explosion wipes out the Fire Dragon! The other bike squad Hit and Run out of combat. Meanwhile the Wraithknight slaps down the Techmarine gunner, but as it's at initiative 1 the plucky Techmarine hits and wounds twice with the servo-arms! Only 4 wounds left...
By killing the Stormtalon this turn, I get the "Scour the Skies" TacO for another Secondary point.

My Wraithknight punches out the right hand TFC, while my vehicles line up shots as best they can. The bike squad next to the pink Serpent hide in melee then escape with Hit and Run at the end of the turn, denying me any shots at them. The lone biker at the bottom Explodes the green Serpent, and the resulting blast wipes out the last Fire Dragon!

Turn 3 Summary-
Primary Mission: 0-0

Secondary Mission: 4-1 Eldar
Tertiary Mission: 1-1

White Scars Turn 4
Drew's 4 remaining Bikers and final Thunderfire begin to realise that they are not long for this world, so try to go out in a blaze of glory. The bikes position themselves between the red and pink Wave Serpents, then they open fire! The red Serpent is downed by a lucky TFC shell after failing its Jink save, while the pink Serpent is destroyed by both units charging and covering it in grenades and meltabombs!
Drew can't do any TacOs this turn, as he's too busy blowing up Wave Serpents...

Drew gets some well-earned revenge, nailing the pink and red Wave Serpents in a single destructive turn...


Eldar Turn 4
Despite losing 3 serpents since my last turn, I am still pretty confident. The hawks precision deep strike onto the relic, and despite one of their number dying to terrain (again), they keep hold of it. Their grenade pack also nails another biker when they arrive. Hell yeah! The Wraithknight hops towards them, hoping to be handed the relic ASAP. I line up a torrent from the Night Spinner on the two bikes, while my 2 remaining Avengers get ready to try and bladestorm any survivors, along with the yellow Serpent.
My shooting is fast and effective- I kill off the 2 remaining bikers from the squad, leaving Drew on 1 biker sergeant with a meltabomb, and a TFC.
I believe I achieved more TacOs this turn, but honestly I can't remember as it was getting late. I also get into Drew's deployment zone, ready to score Linebreaker.

I forgot to take a picture this round- sorry! Just imagine some Swooping Hawks on the relic in the picture above, and 3 less bikers in the squad of 3...


Turn 4 summary-
Primary Mission: 5-0 Eldar
Secondary Mission: 4-1 Eldar
Tertiary Mission: 2-1 Eldar

White Scars Turn 5
By now the game is almost over. Drew tries to kill the Hawks holding the relic, but the TFC scatters wildly and the biker's bolter fails to breach their armour.

Damned servo-skull, forgetting to take all of these pictures! It'll be fixed by next time...


Eldar Turn 5
I move the Wraithknight next to the hawks and pass him the relic (making sure to walk to avoid dangerous terrain), then shoot the remaining biker and wound the TFC. At this point we call the game, as Drew has 1 Thunderfire Cannon left and no way of realistically harming my Wraithknight, who now has the relic.

The scene at the end of the game- my Wraithknight is holding the objective and Drew doesn't have the tools to take it from him. The last biker was just in front of the yellow Wave Serpent. We don't roll for turn 6, as the game is essentially over.

Final Summary-
Primary Mission: 5-0 Eldar
Secondary Mission: 4-1 Eldar
Tertiary Mission: 2-1 Eldar

Final Score: 20-0 Eldar
(10TP for winning the primary mission, 6 TP for winning the secondary mission, 4 TP for winning the tertiary mission).

Victory for Craftworld Skittles!
That was a tough test for the list- scouting bikes are never fun to play against, and I was really worried after Drew seized on me! However the sheer volume of firepower from the Wave Serpents was disgusting at times, kicking out 10 hits on a slow turn, all at str 6+! The Dire Avengers pitched in too, the threat of Bladestorm encouraging Drew to Jink, thus limiting his firepower. MVP has to go to the Swooping Hawks though- they're one of my favourite units, and they never fail to perform! I hadn't originally planned on including them, but for less that 100pts they're an absolute steal.
I originally planned to ally an inquisitor with 3 servo skulls into the army as my second detachment, but decided that the extra firepower of 4 shuriken cannons would be more valuable as long as I could still do well in this matchup, and I think this game shows it can. The white scar alpha strike was strong, but not so hard that I couldn't bounce back. I'm always impressed by my army's ability to withstand enemy alpha strikes, and then deliver one back!

I think one of the key things I improved on this game was not Jinking as often as usual- in the first turn, I was ready to suffer some immobilised results if it meant getting all of my firepower in return, and it really paid off! Drew was a bit more cautious, Jinking with most of his units, and I think that cost him quite a lot of firepower. It's one of the biggest changes from 6th edition to 7th in my eyes, and it's tricky to get the hang of deciding when to Jink or not. Sometimes it can mean losing an extra hull point or a couple more bikers, but it can often be worth the trade.

Overall I really enjoyed the game, and certainly learned a lot about the White Scars matchup. I want to thank Drew again for being so sporting, and agreeing to play against my cheesy Serpent Spam list.

Thanks for reading my first battle report! There'll be more to come soon, and some articles too.
Next up will be a post on the thoughts and design process behind my list, followed by some strategy articles containing tactics you can use against some of the more popular tournament lists. Once again, feel free to comment on anything in the post or ask me any questions in the box below.

SimonW